Category Archives: Lighting

BATHROOM VANITY

I write a wildly popular and critically acclaimed blog that is beloved by nearly every man, woman and literate baby on the planet. You know this. I know this. Your mom knows this. What your mom also knows is that, from time to time, I let things slip through the cracks. I apologize for that. On occasion, I have been known to, erm, forget to update you all on what I’ve been up to. Sometimes I work in secret. Listen, pals, I agree: that’s a terrible habit to have when you’re a DIY blogger who makes a six-figure living writing instructional how-to’s for anonymous people to disparage over the Internet. I blame my parents. Truthfully, I point the finger at them for a lot of things that have gone wrong in my life–missed opportunities, failed relationships, bootcut jeans–and I could go into why they are responsible for all that stuff but that would be long and bitter and not becoming of me. The simple fact is they are not here to defend themselves. They live across the country and this is my blog and I can do what I want, so if I’ve done something to offend you just shake your fists at the heavens and yell through clenched teeth, “DAMN YOU, EVAN’S MOM AND DAD! DAMN YOU FOR ALWAYS BEING THERE FOR HIM! MAY LUCIFER HAVE MERCY ON YOUR ROTTEN, WELL-INTENTIONED AND SOULS!”

Feel better? I do.

So, yea, occasionally I do secret things and occasionally I don’t write them down. But, like you, I’m only half-human. I can only keep so many secrets to myself before bursting at my cyborg seams! Now that Gone Girl is out and I’ve been asked by 1) friends 2) family and 3) random passers-by on the street (who try to tell me I don’t need to yell to be heard) to not let any spoilers slip I’m at max capacity, kittens. I have to let something out! It’s bad enough I walk around pretending like I didn’t listen to the free U2 album a few 18 times or that I’m not all in when it comes to Viola Davis teaching law students how to be ninja assassins or that I’m never THIS CLOSE to having cookie dough for breakfast every morning or that when I finally get my wits about me and make a cup of coffee I’m not just standing at the counter, staring longingly at that tight tube of butter, flour and chocolate, while softly weeping into my scrambled egg whites. I’m so tired of carrying the weight of the world on my narrow, slightly hunched shoulders, you guyz!

So here’s my secret: I’ve been working on my bathroom. I’ve been working on a lot of things, actually–my temper, my communication skillz, my anger when the coffee lady gives me skim milk WHEN CLEARLY I ASKED FOR HALF-AND-HALF, my temper–but my bathroom is getting most of the attention. I’ve been in my apartment for over two years now, which coincidentally is 20 years shy of my age (and not 30 as my birth certificate would have you believe), and I’m getting more than a little fed up with it. The apartment itself is fantastic. I know this and you and your mom better know this. But, as is human nature, after a lengthy period of monogamy you want to ruin the good thing you have by seeing someone younger and sexier. That’s where I’m at with my place. I love it, but when spend your days like I do, working inside other people’s luxury high-rise sky buckets, how can you come home to your own place and not want to make a few dozen changes here and there at the very least?

I started with the bathroom because it’s the most egregious room in the apartment. Most bathrooms of rental properties are terrible. You know what? No. All. All bathrooms. And kitchens, too! THE WORST. That’s just, like, the 7th Universal Law of Man. And if you don’t believe me then I assume you think yours are *pretty nice? Well, I find that kind of ignorance adorable, my little aardvarks, like someone pushing hard on a door marked ‘pull’. You can try to deny it but being a renter (or a first-time homeowner) means you have a shitty wash closet and an even shittier counter top.

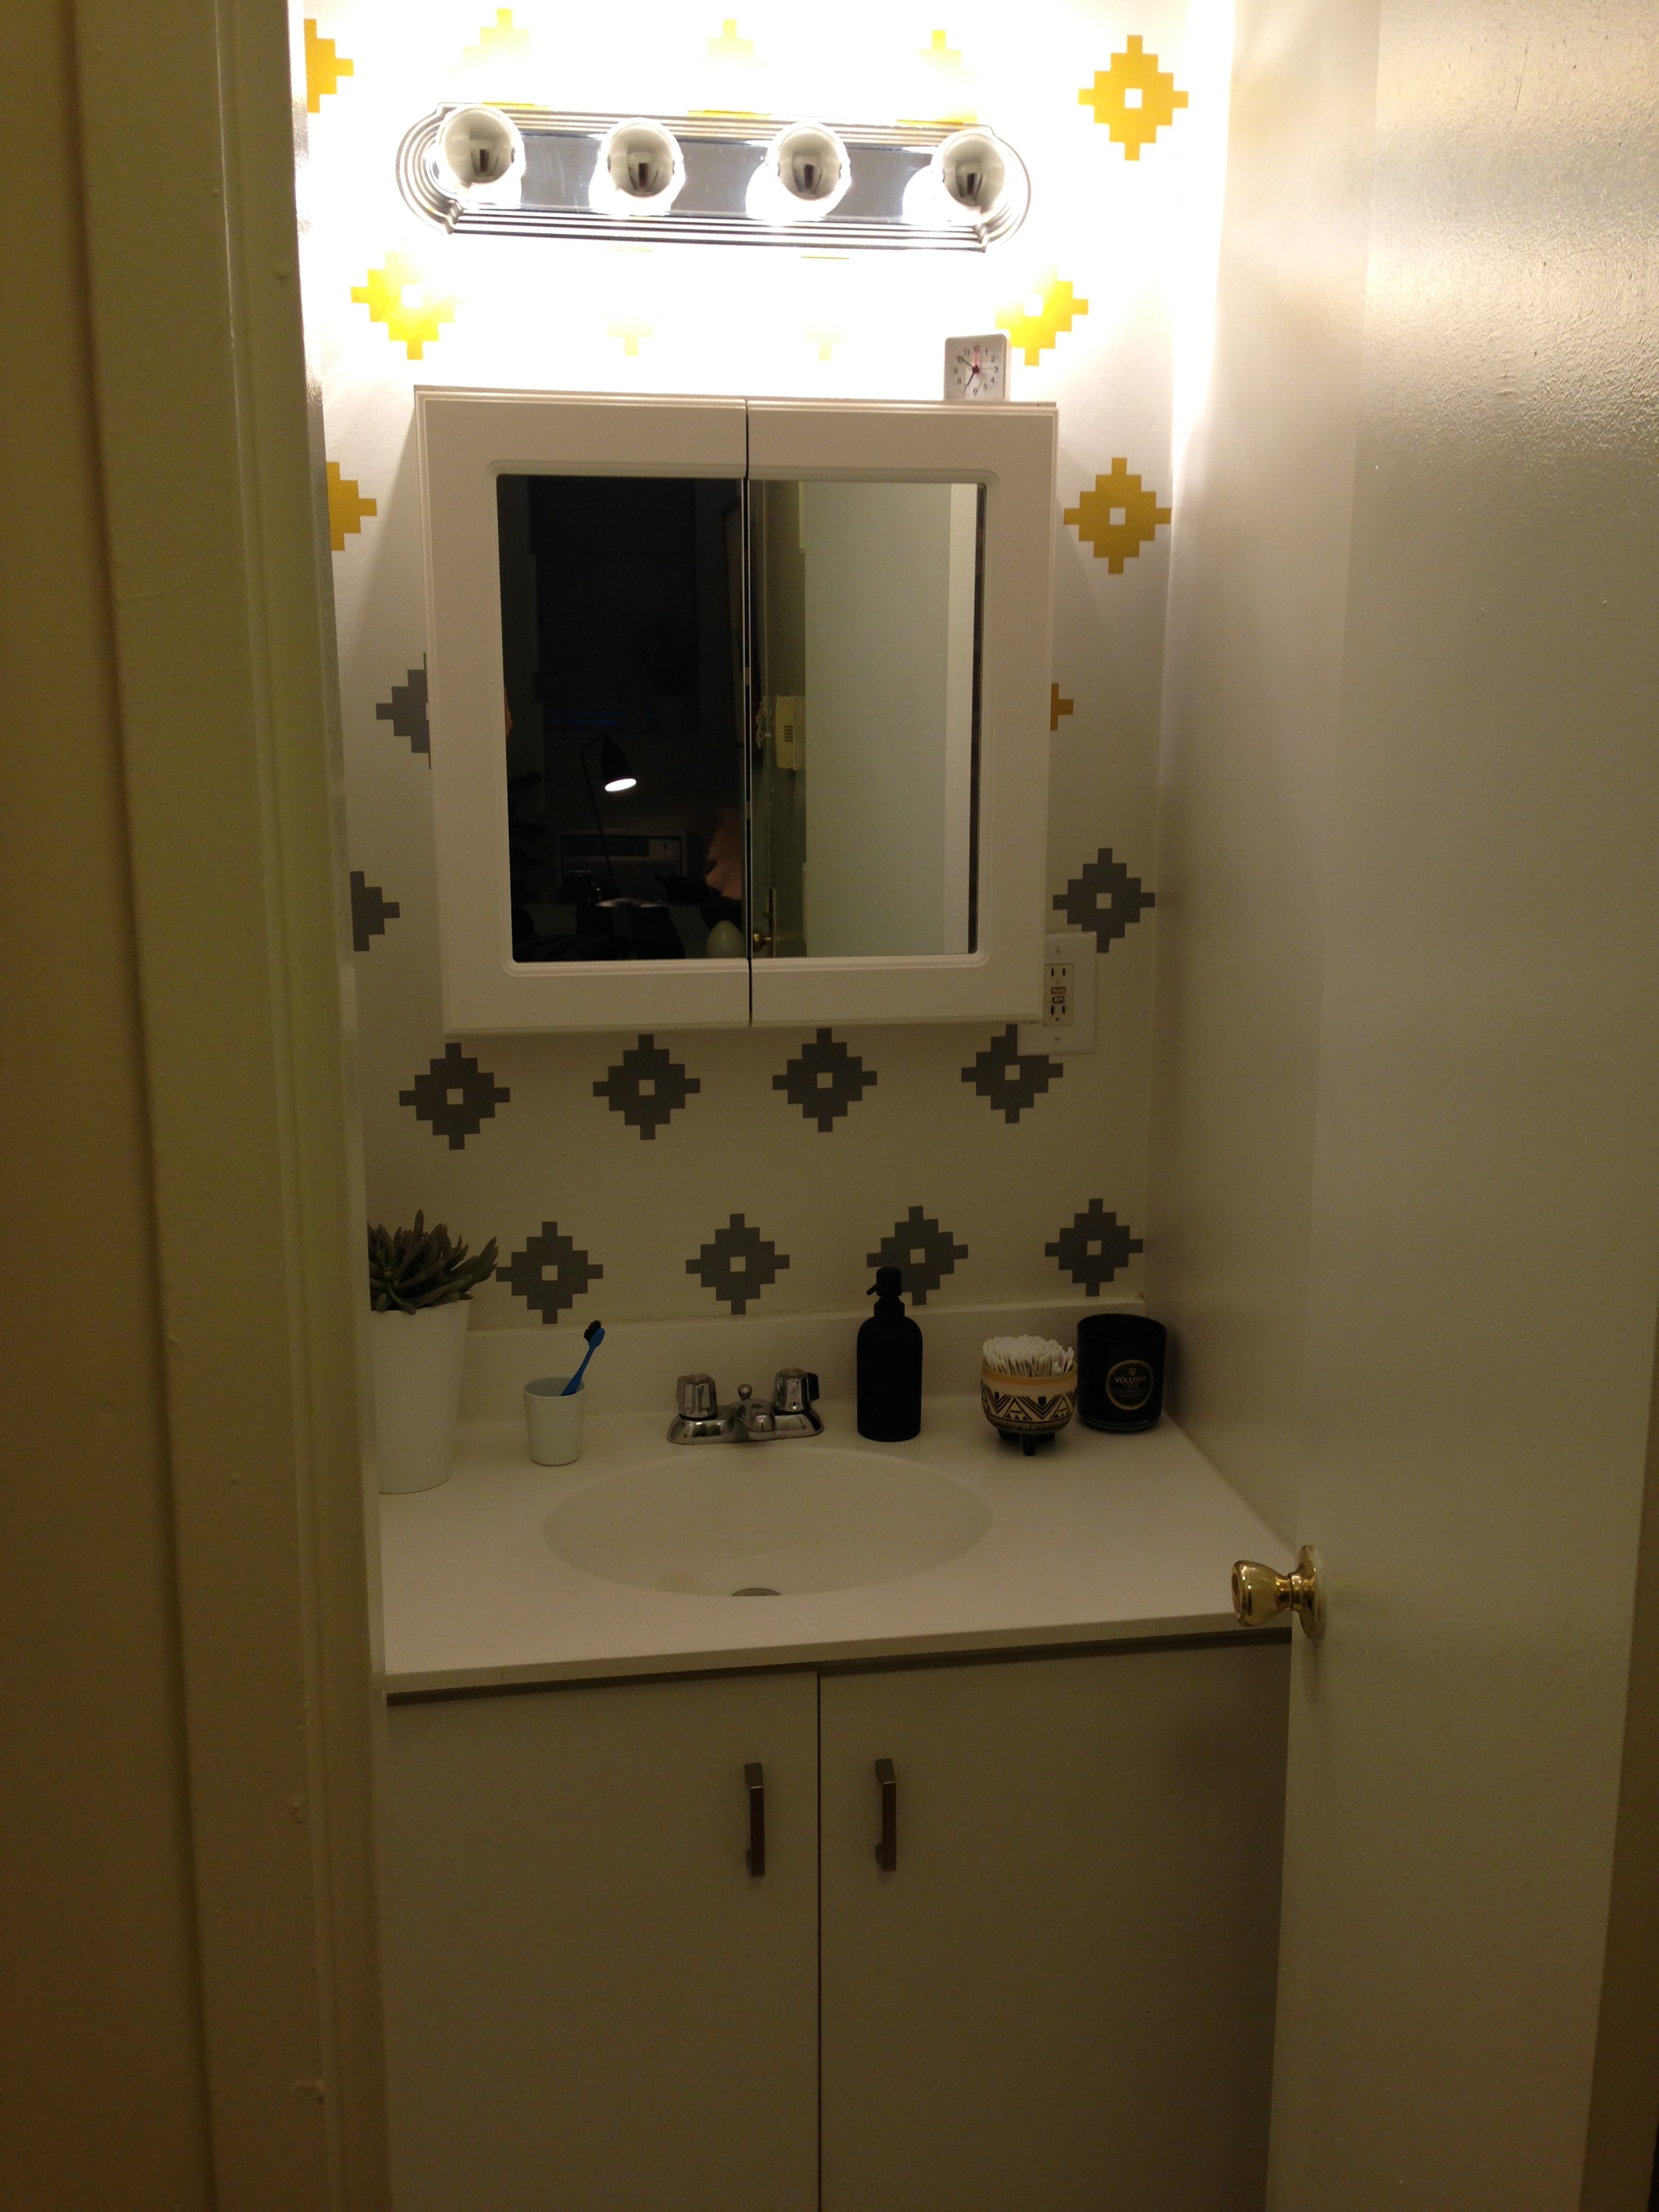
Before I get ahead of myself, let’s get acquainted with my bathroom, WHICH I CALL MISS JACKSON BECAUSE IT’S NASTY:

CUTE, RIGHT????? Like you in college this was an experimental phase for my bathroom, circa last year. I did what I thought was my best at the time, but even MUR decals and some half-mirror bulbs can’t hide that heinous, generic, store-bought, sloth-turd, slithering succubus of light AKA the Hollywood vanity fixture.

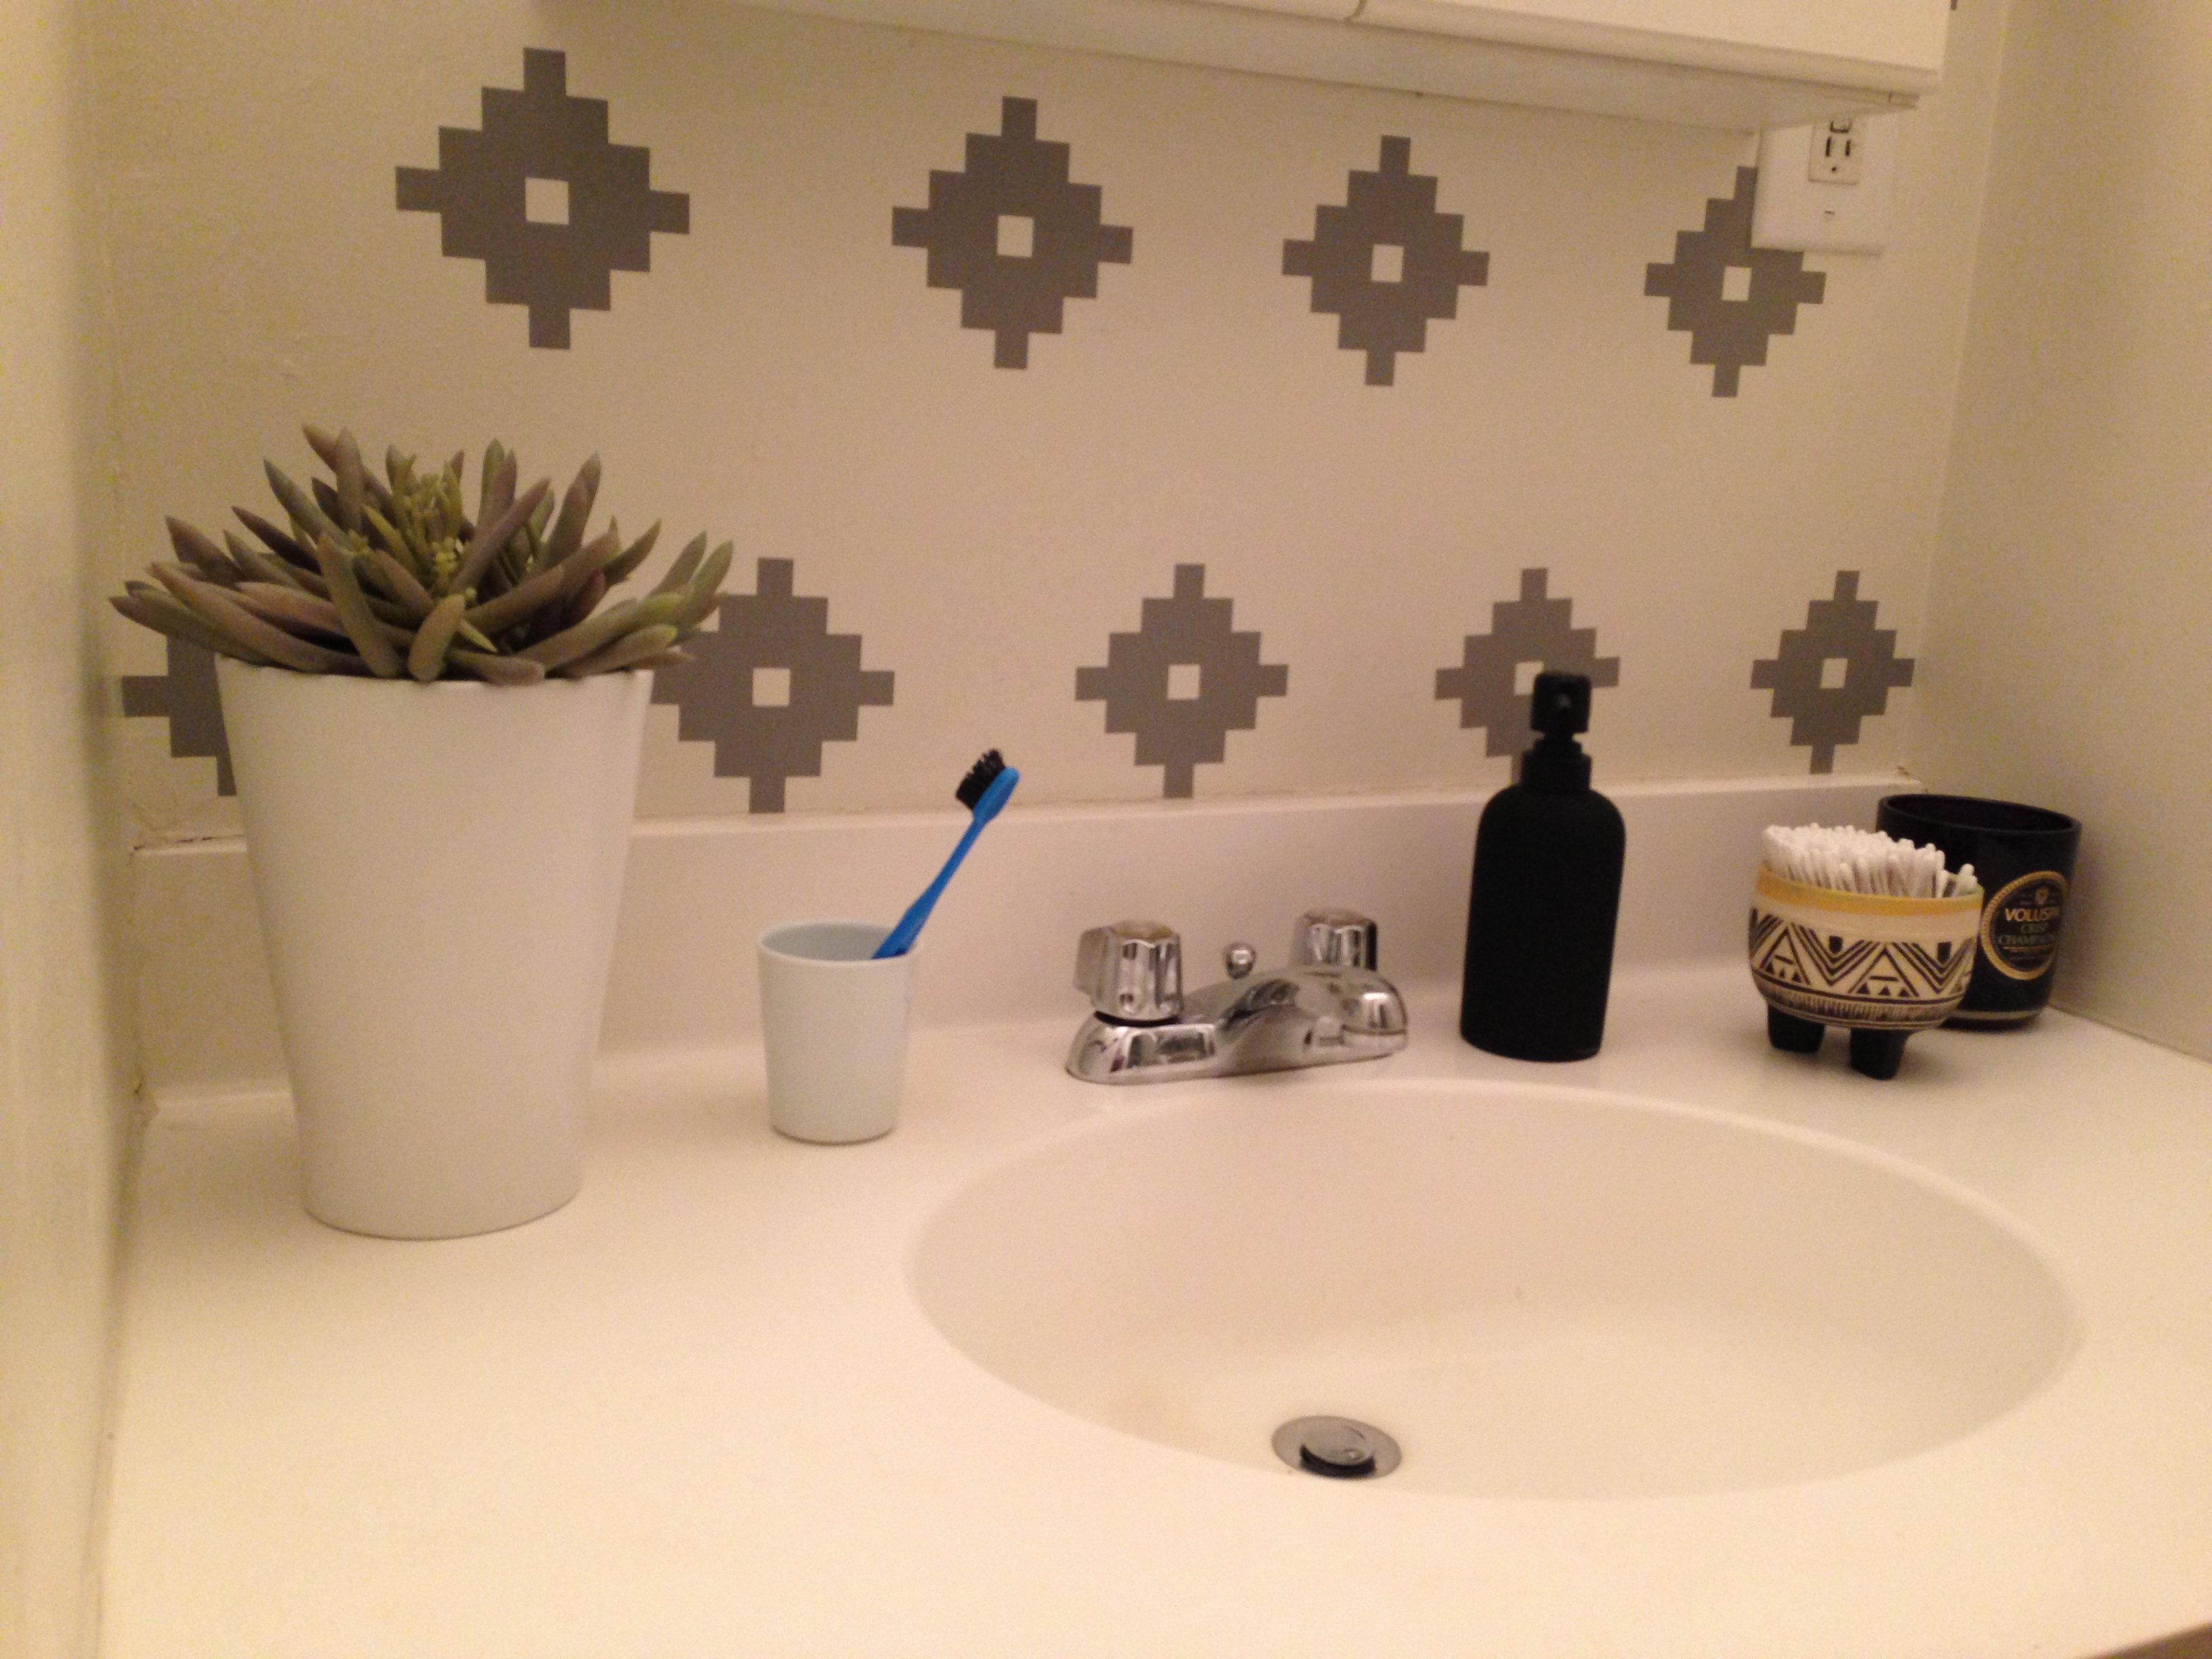
Here’s another shot from even earlier, when I first moved in:

EL OH EL I just love this picture. I put a task lamp on the sink and I’m wearing a t-shirt with the sleeves cut off. I WAS SUCH THE COMEDIAN BACK IN THE DAY. No but really 2012 was a year I erased from my mind.

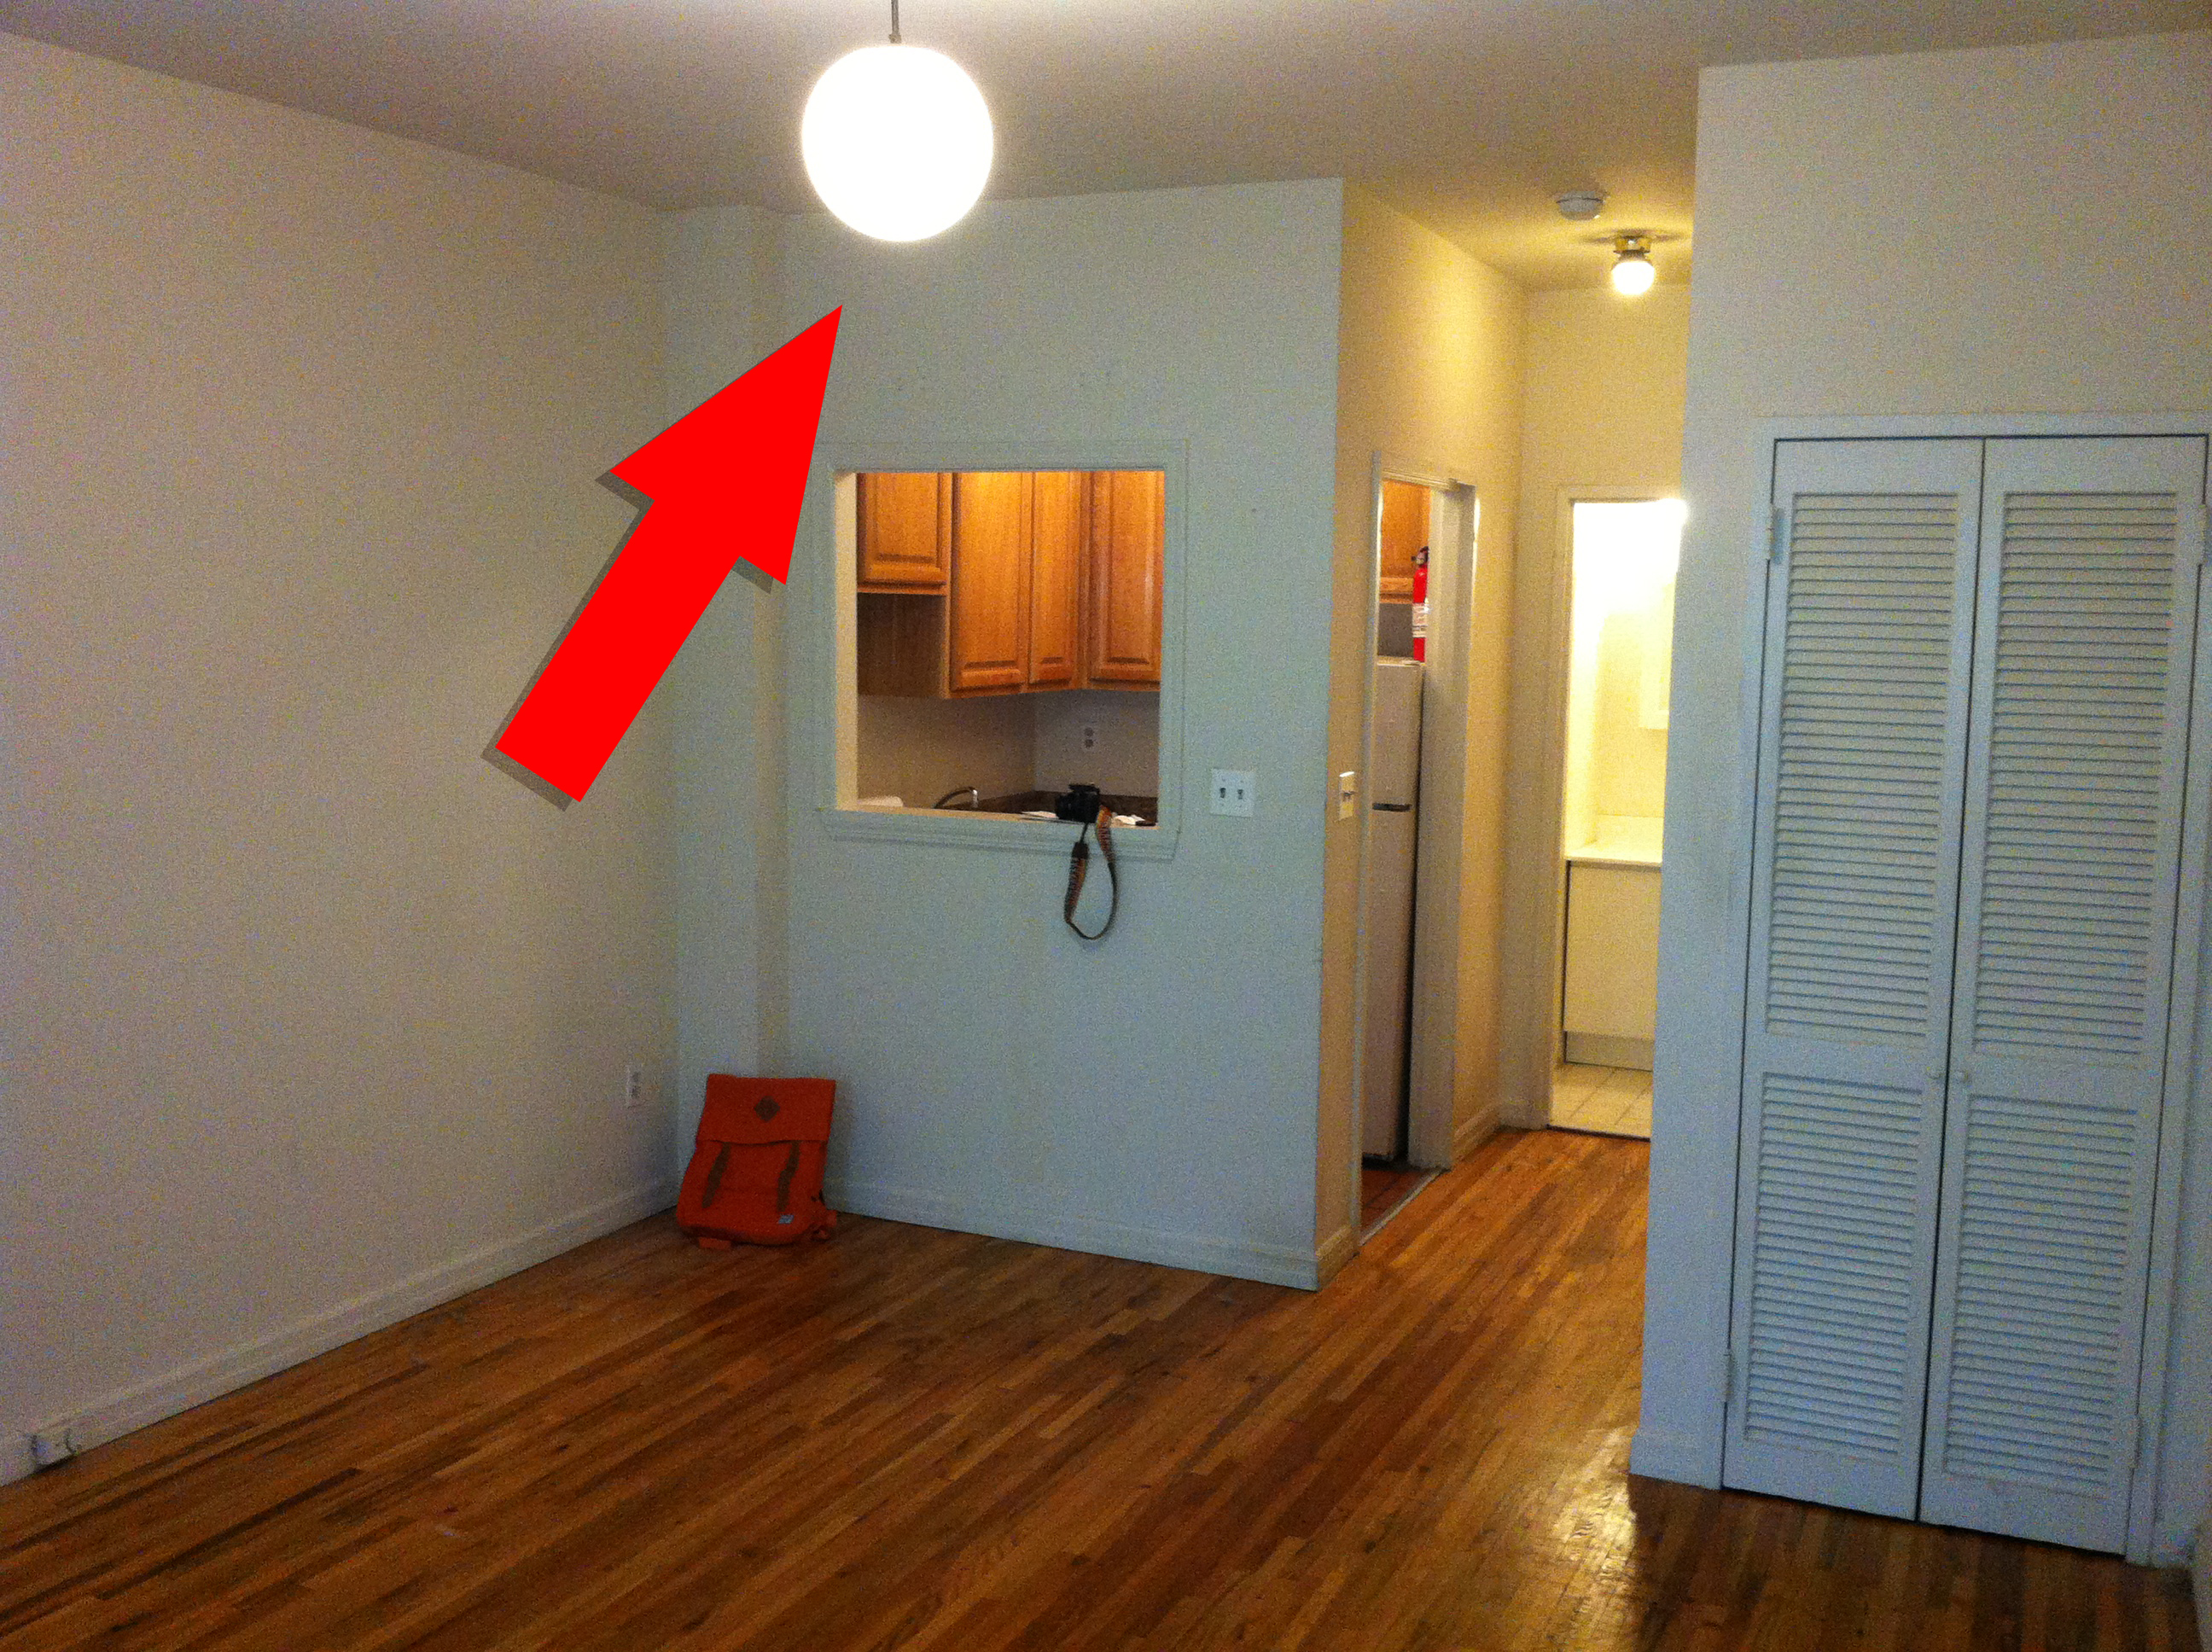
Now, if this were a hearing and I the prosecutor, at this point I would rest, confident that I made my case against rental bathrooms on the whole, but more specifically my own nest of toilet horror. The defense, however, would counter by asserting that questionable styling and misguided decor decisions are to blame, not my bathroom vanity, and that charges should be downgraded from second-degree murder to involuntary manslaughter of my eyes. As the prosecutor I would agree so I would take my two index fingers and tap them repeatedly in a half-hearted attempt at applause, as it is a fair point to make, but then I would present this piece of evidence, highlighting the culprit:

Ignoring for a moment the frightening man-monster I artfully drew, you can see without a doubt the light fixture and medicine cabinet are, in fact, giant assholes. At this point the judge would bang her gavel, the courtroom would erupt in cheers, I would lean over the bar, high-five my students whom I made work on the case for free and then Shonda Rhimes and I would walk hand-in-hand out of the building to a Hall & Oates song. The end. Roll credits, ABC.

But seriously. Something needed to be done. So I got my hammer, took my neighbor’s screwdriver without asking and set off dismantling the tentacled man-monster:

This was me feeling optimistic and grand about the whole endeavor, as you can tell by the fact that I hadn’t yet removed the Hollywood fixture’s mounting plate. (More on that in a second.) An unforeseen causality during the demo was my super-stellar MUR decals. They bit the dust along with the vanity, but other than that so far, so good. I can see what I’m working with and everything seems right with the world. OH JOYOUS DAY!

Now some disturbing news…

Nestled inconspicuously behind the cabinet, on the ledge of a steel frame, was a shekel. “A shekel?” you say. “Yes,” I answer. “Hm, a shekel,” you say again. “Stop repeating what I’m saying and just read the post, jerk,” I scold. I found a shekel behind my medicine cabinet. Normally I wouldn’t think twice about finding a piece of currency in an odd place because HEY we all come home from time to time and throw our money around like we’re Scrooge McDuck taking a lap his money vault. However, on the right hand side doorpost to my apartment is what appears to be the outline of a mezuzah which has since been removed. That, along with the shekel I found and more importantly relocated from behind my bathroom wall, can only mean one of two things: 1) I’ve defiled a Jewish tradition meant to protect my apartment and I’m going to die tomorrow or 2) I’ve lifted a Jewish curse on my home and now I’ll live forever. I’m holding out hope for the latter but if there are any Jews who read this blog please don’t hesitate to speak up as my life is on the line. Thank you.

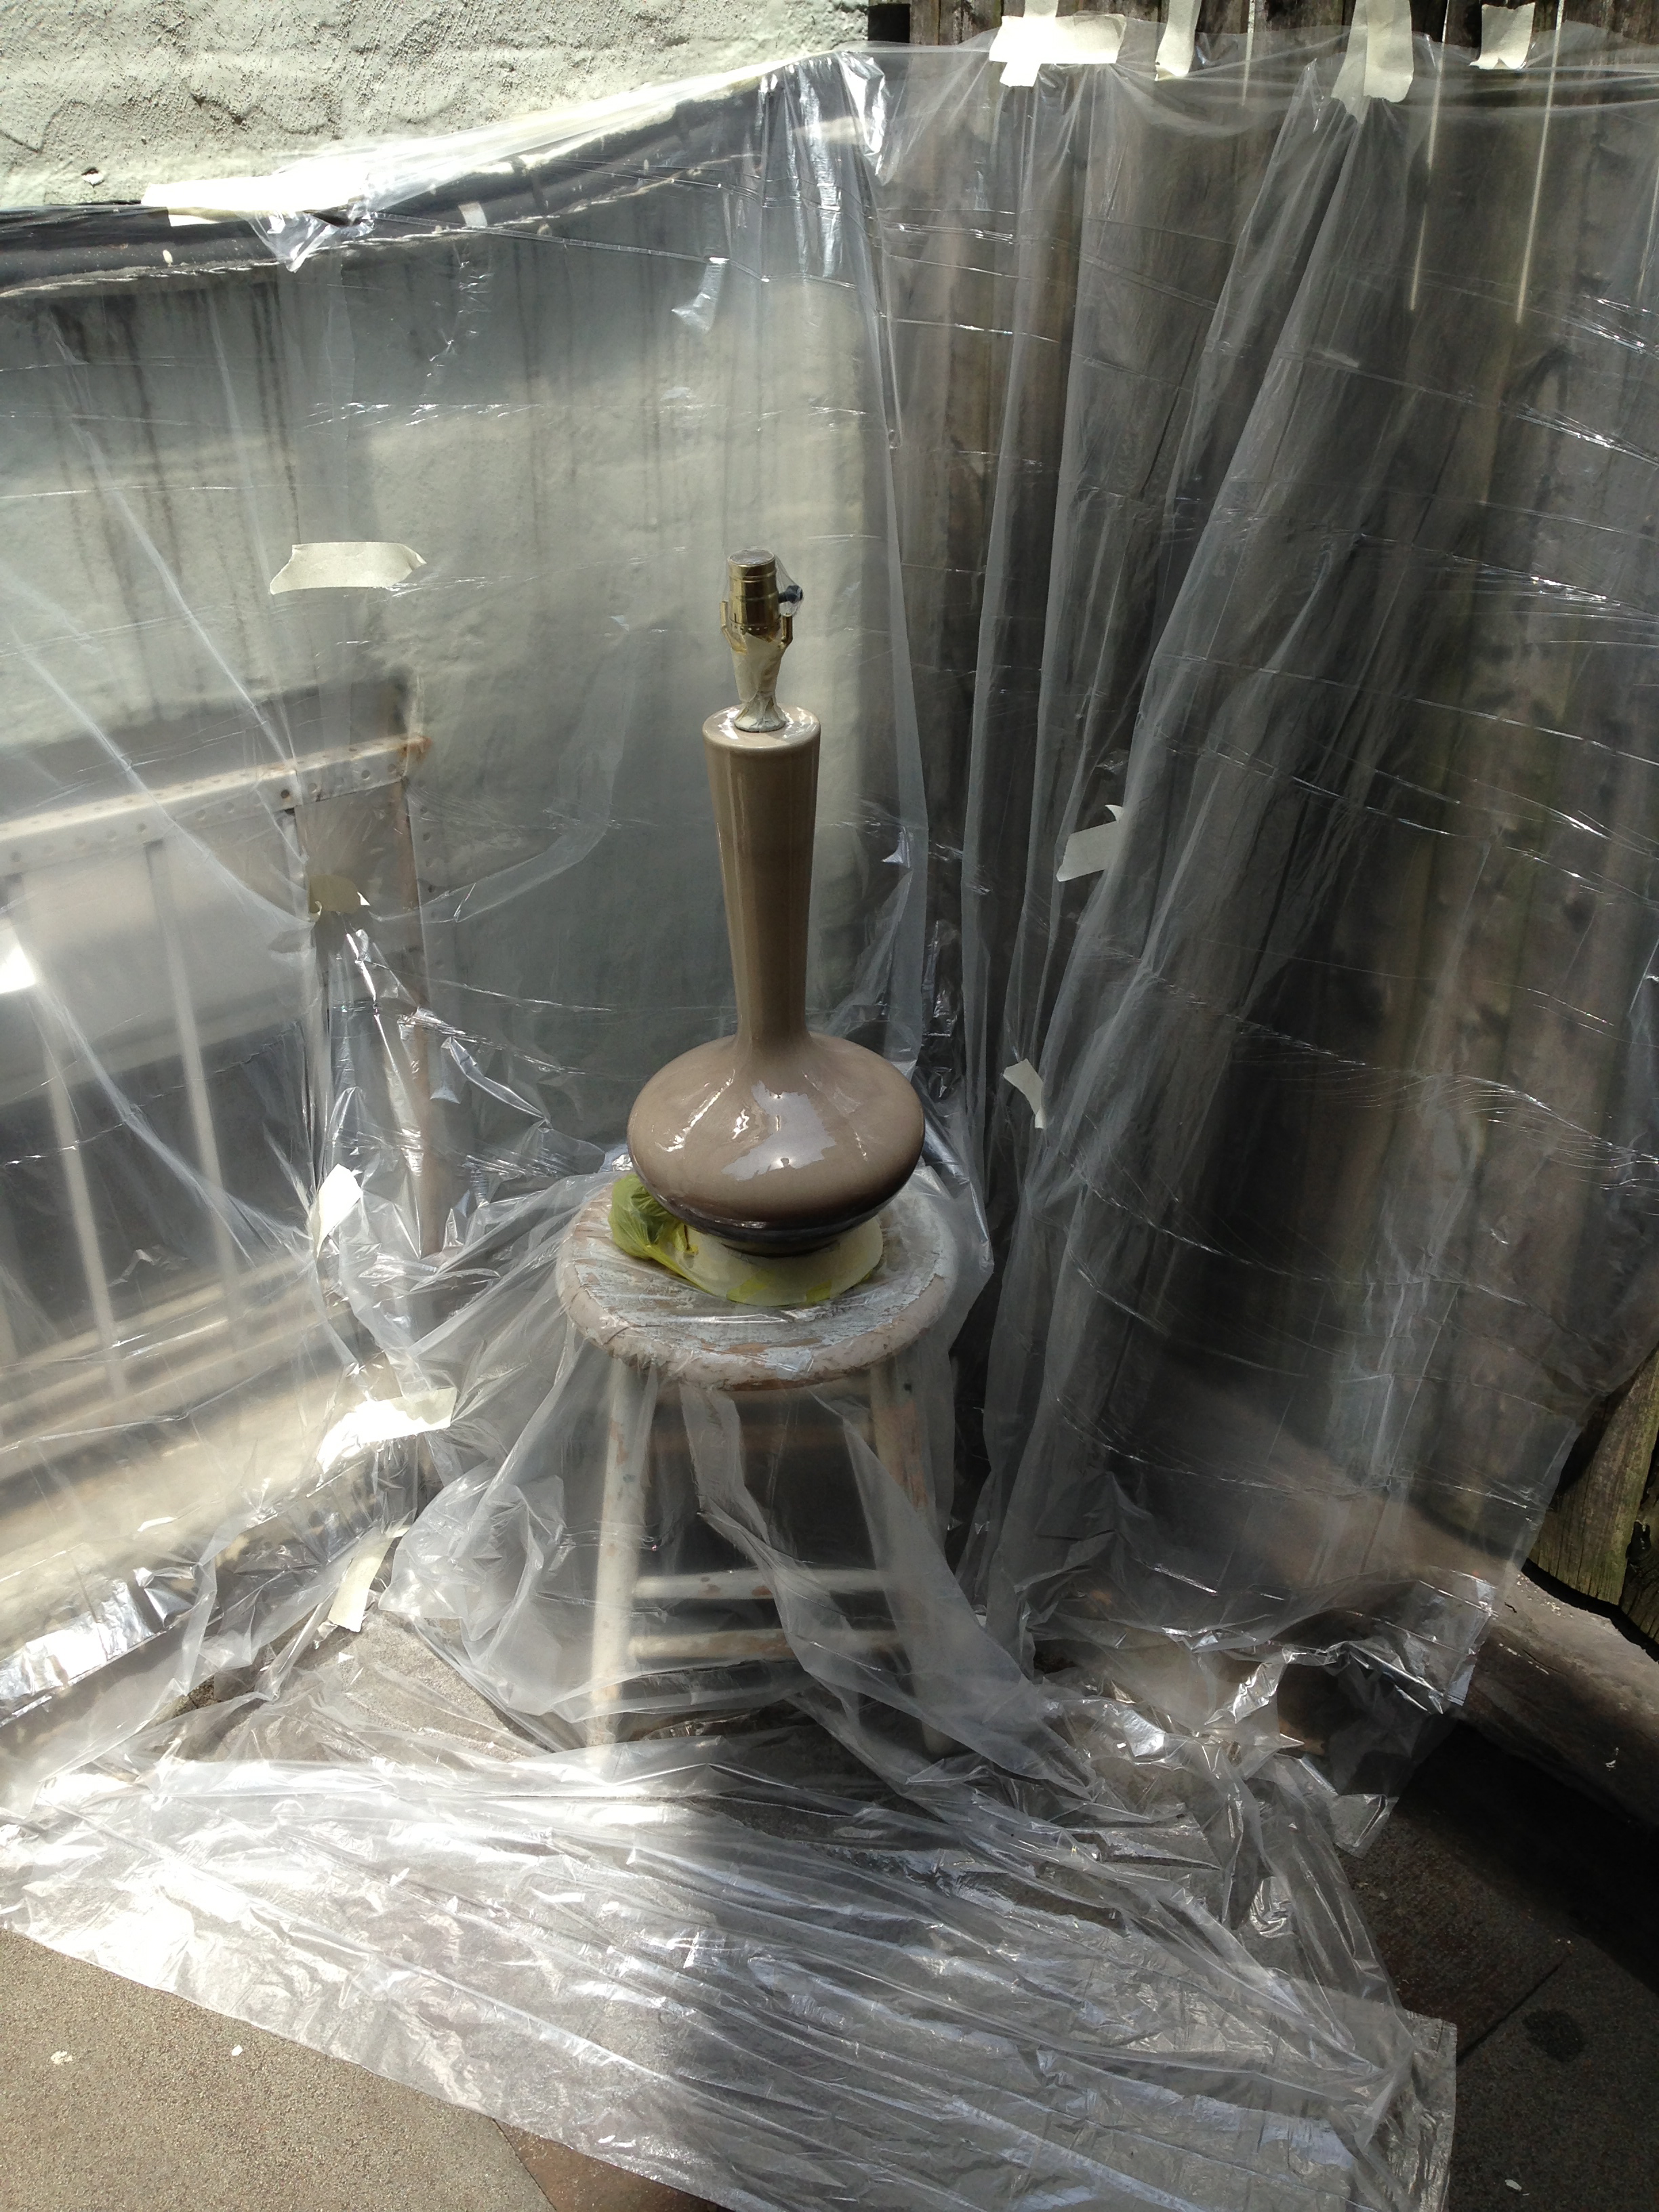
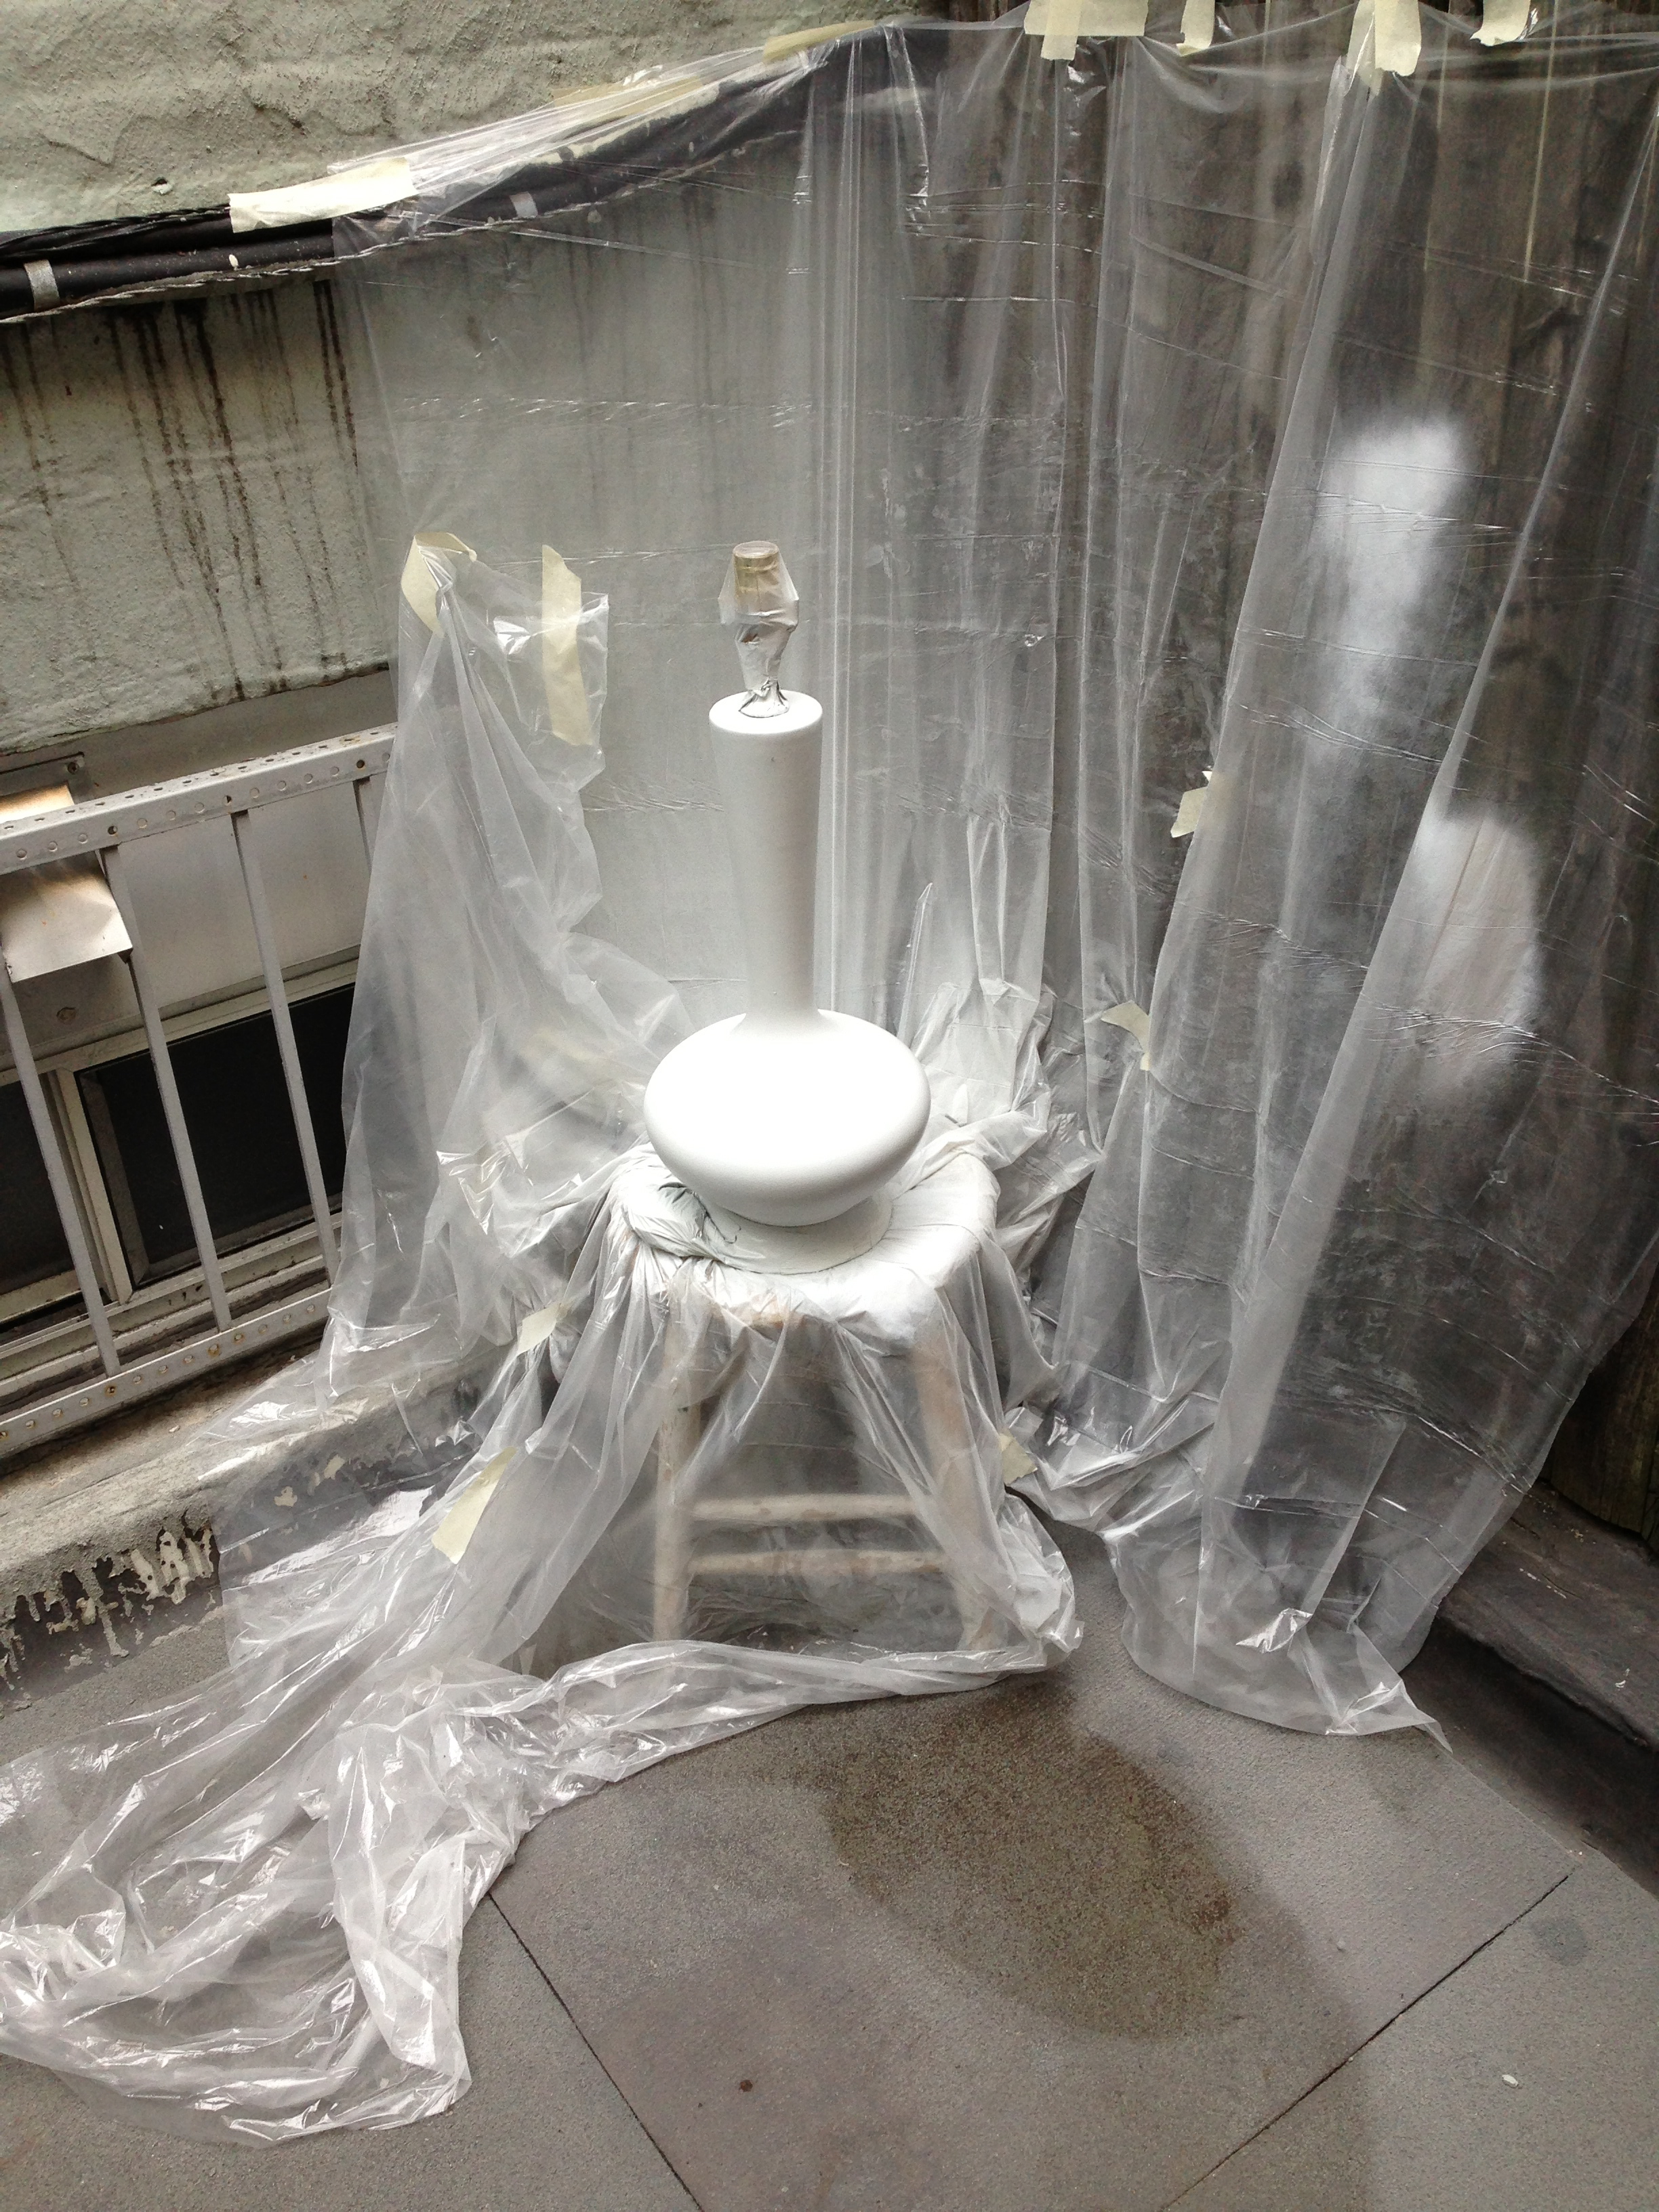
Back to the vanity. So like I said, aside from the curse on my soul, everything was peaches and baby farts up until this point. It was all breezy. I’ll admit I didn’t have a great fix lined up for this project. I went to IKEA and bought a similar fixture for 15 spanks, and while it still had the same shape it lacked beveled edges or garish-looking plastic aluminum and that was enough for me. Then I decided to hack away at the mounting plate of the Hollywood fixture and shit got real. Really real:

What. The. Fuck.

What your human head lenses are seeing is a junction box installed approximately 5 1/2 inches OFF CENTER. WHAT THE FUCKING FUCK, OLD-TIMEY PEOPLE WHO BUILT MY APARTMENT? What were they thinking! No doubt this had to do with something obnoxious and asinine like a fire code but all I knew as that a hole slightly to the left of center was not a hole I wanted to tango with.

This ruined my plans for a quick and painless $15 IKEA fixture. Just decimated them. Poof! Gone.

I knew I didn’t want to keep the Hollywood fixture under any circumstance, and that decision meant the wall would have to be patched, even if I didn’t know what was going in its place.

That’s just some spackling paste and a spatula I used to fill in the uneven spots, like the holes where the fixture attached to the wall and the edges where years of paint buildup met the fixture. I let it dry then with a fine grit sandpaper–something like 240–leveled the entire slop bucket out so it was as supple as something that is supple.

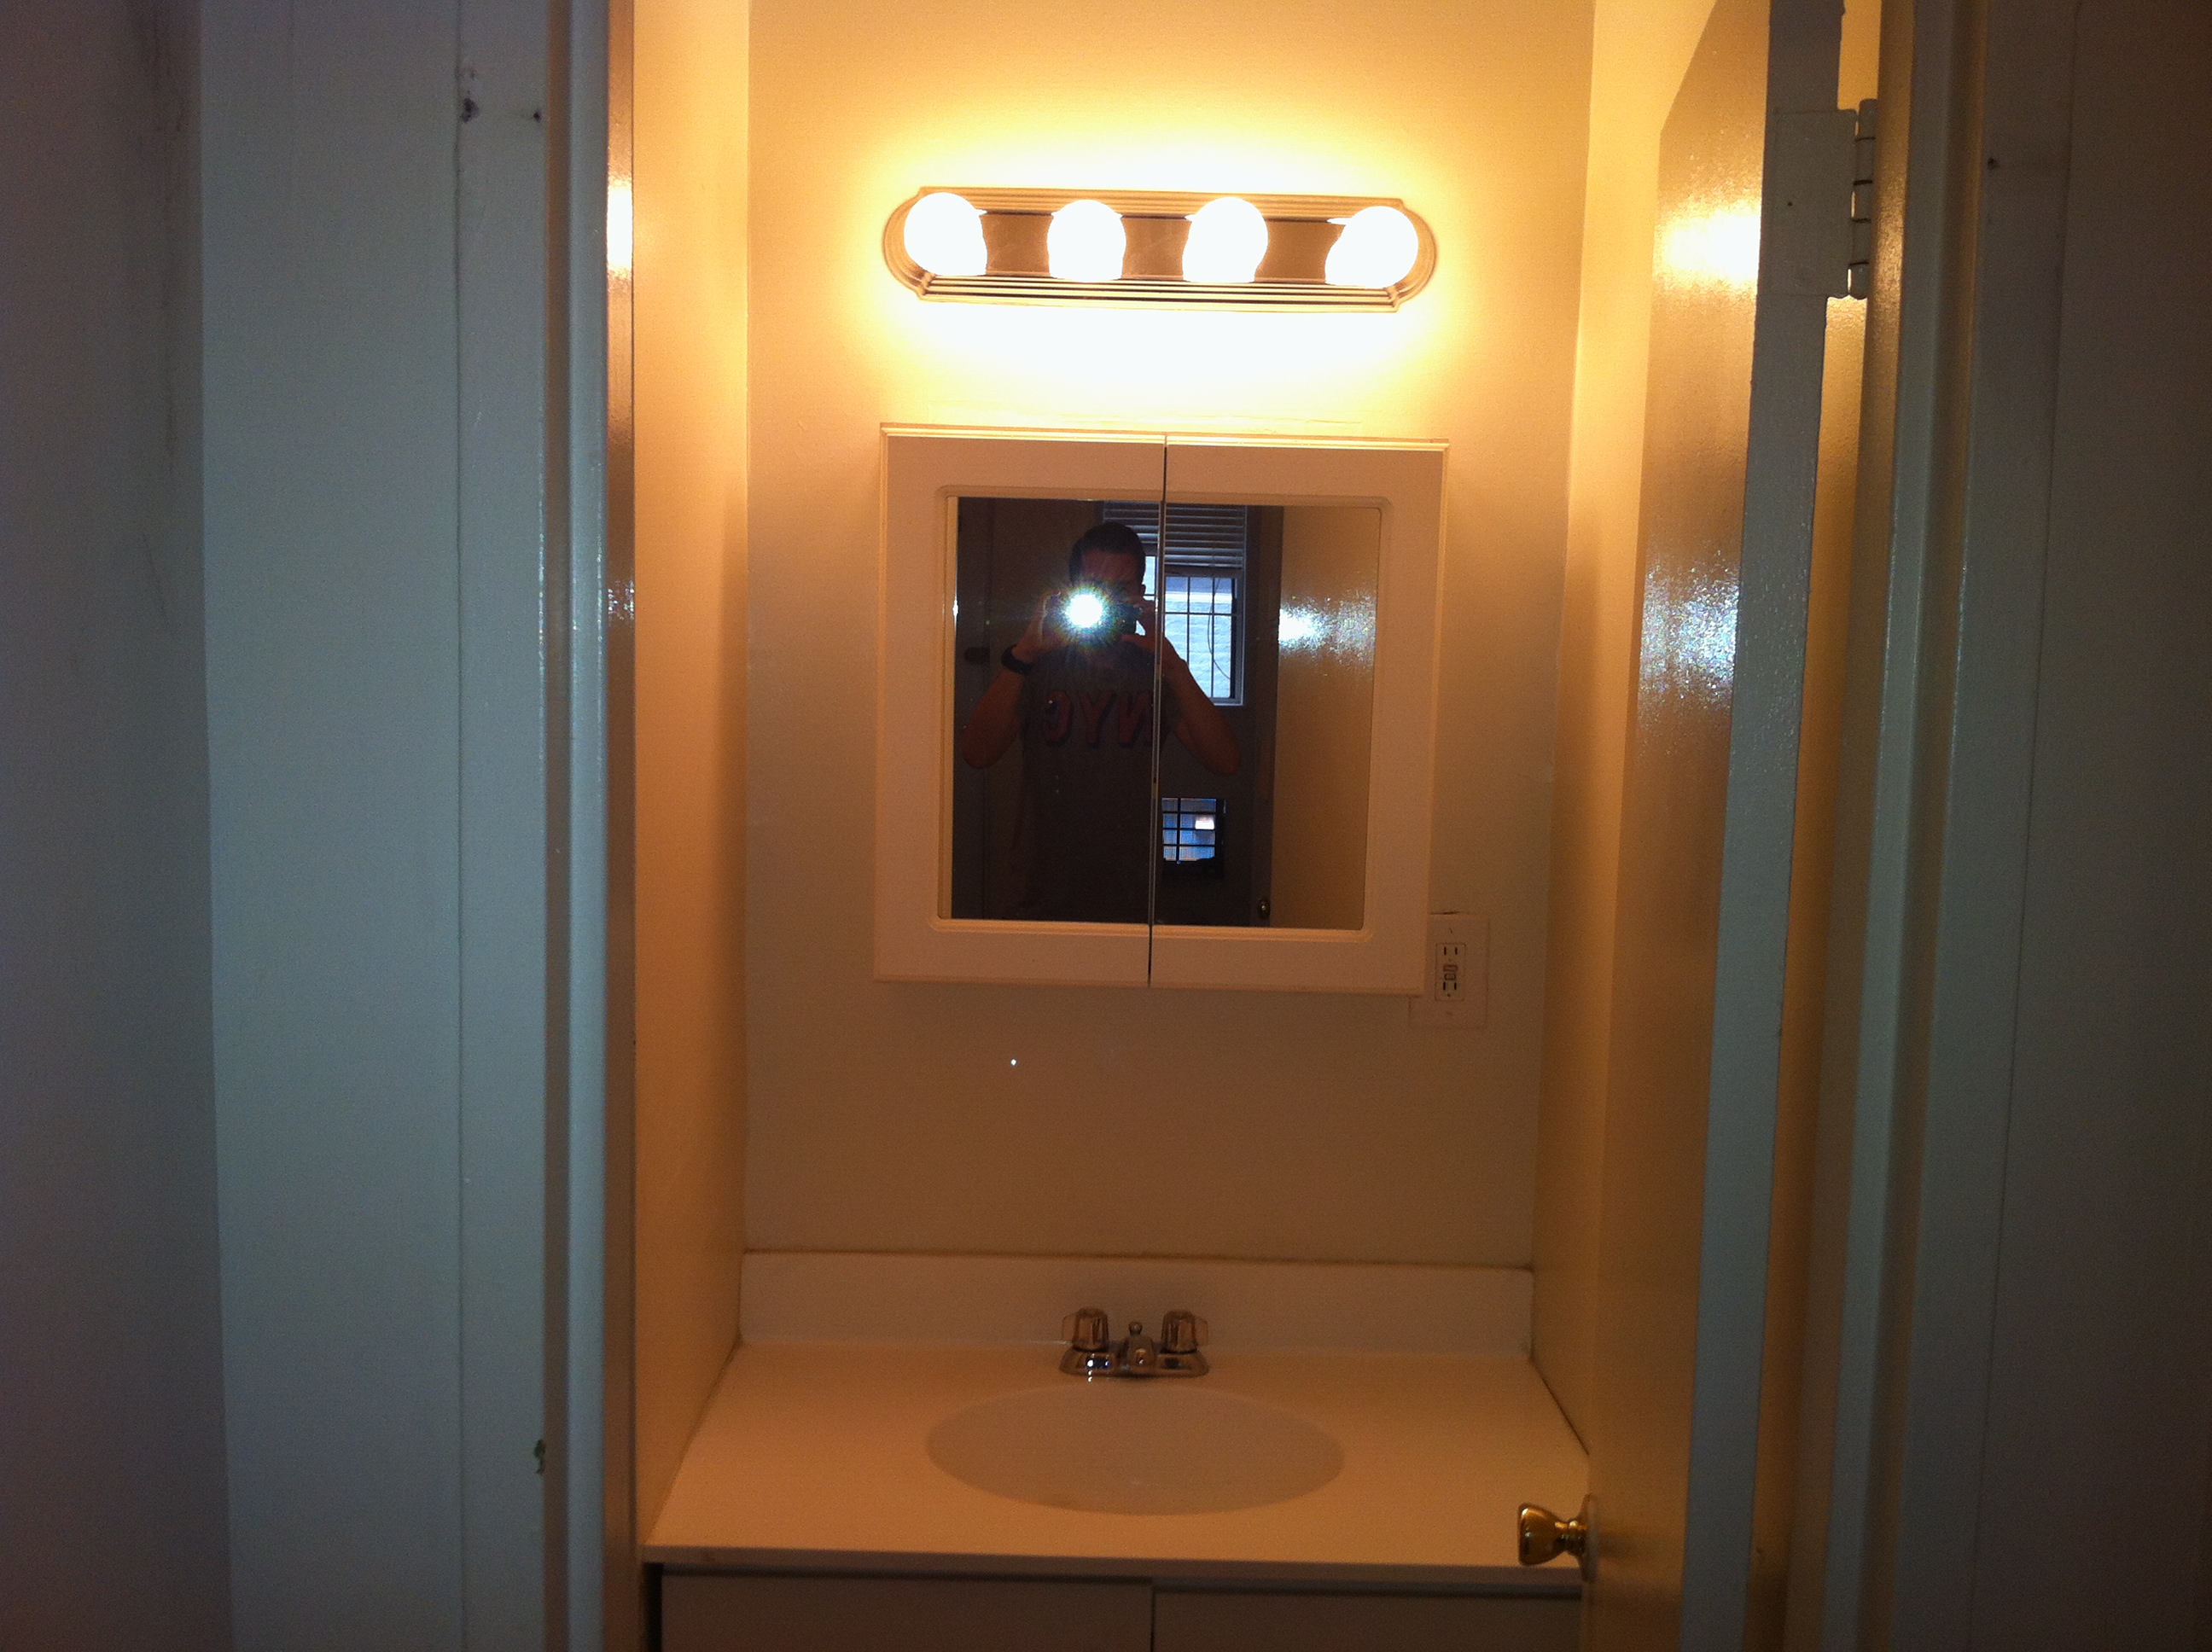
Oh, wait! Did I mention this part? I put up a new medicine cabinet. Dur. Hello, Evan.

And how! IKEA. $70. The proportions work so much better than the old one. Fills out the space nicely. Me likey.

Back to the vanity light. Once the spackling paste dried I ran downstairs and stole some paint from my super’s utility closet, rolled it out on a piece of cardboard, huffed a bit and painted over everything so it was all one color:

Not bad, right? WRONG. THAT HOLE IS STILL NOT CENTERED, DUMMY.

What to do, what to do? I looked at a ton of options. A ton. A fuck ton, to be precise, but I couldn’t find anything preassembled that would fit this unique requirement. I decided to take a page from my own book and build one because when the chips are down and it’s the 11th hour that’s the time when you want to forget about reinventing the wheel and rest on your laurels!

Apologies for the shit picture. I’m not Ansel Adams and you’re not an art critic neither!

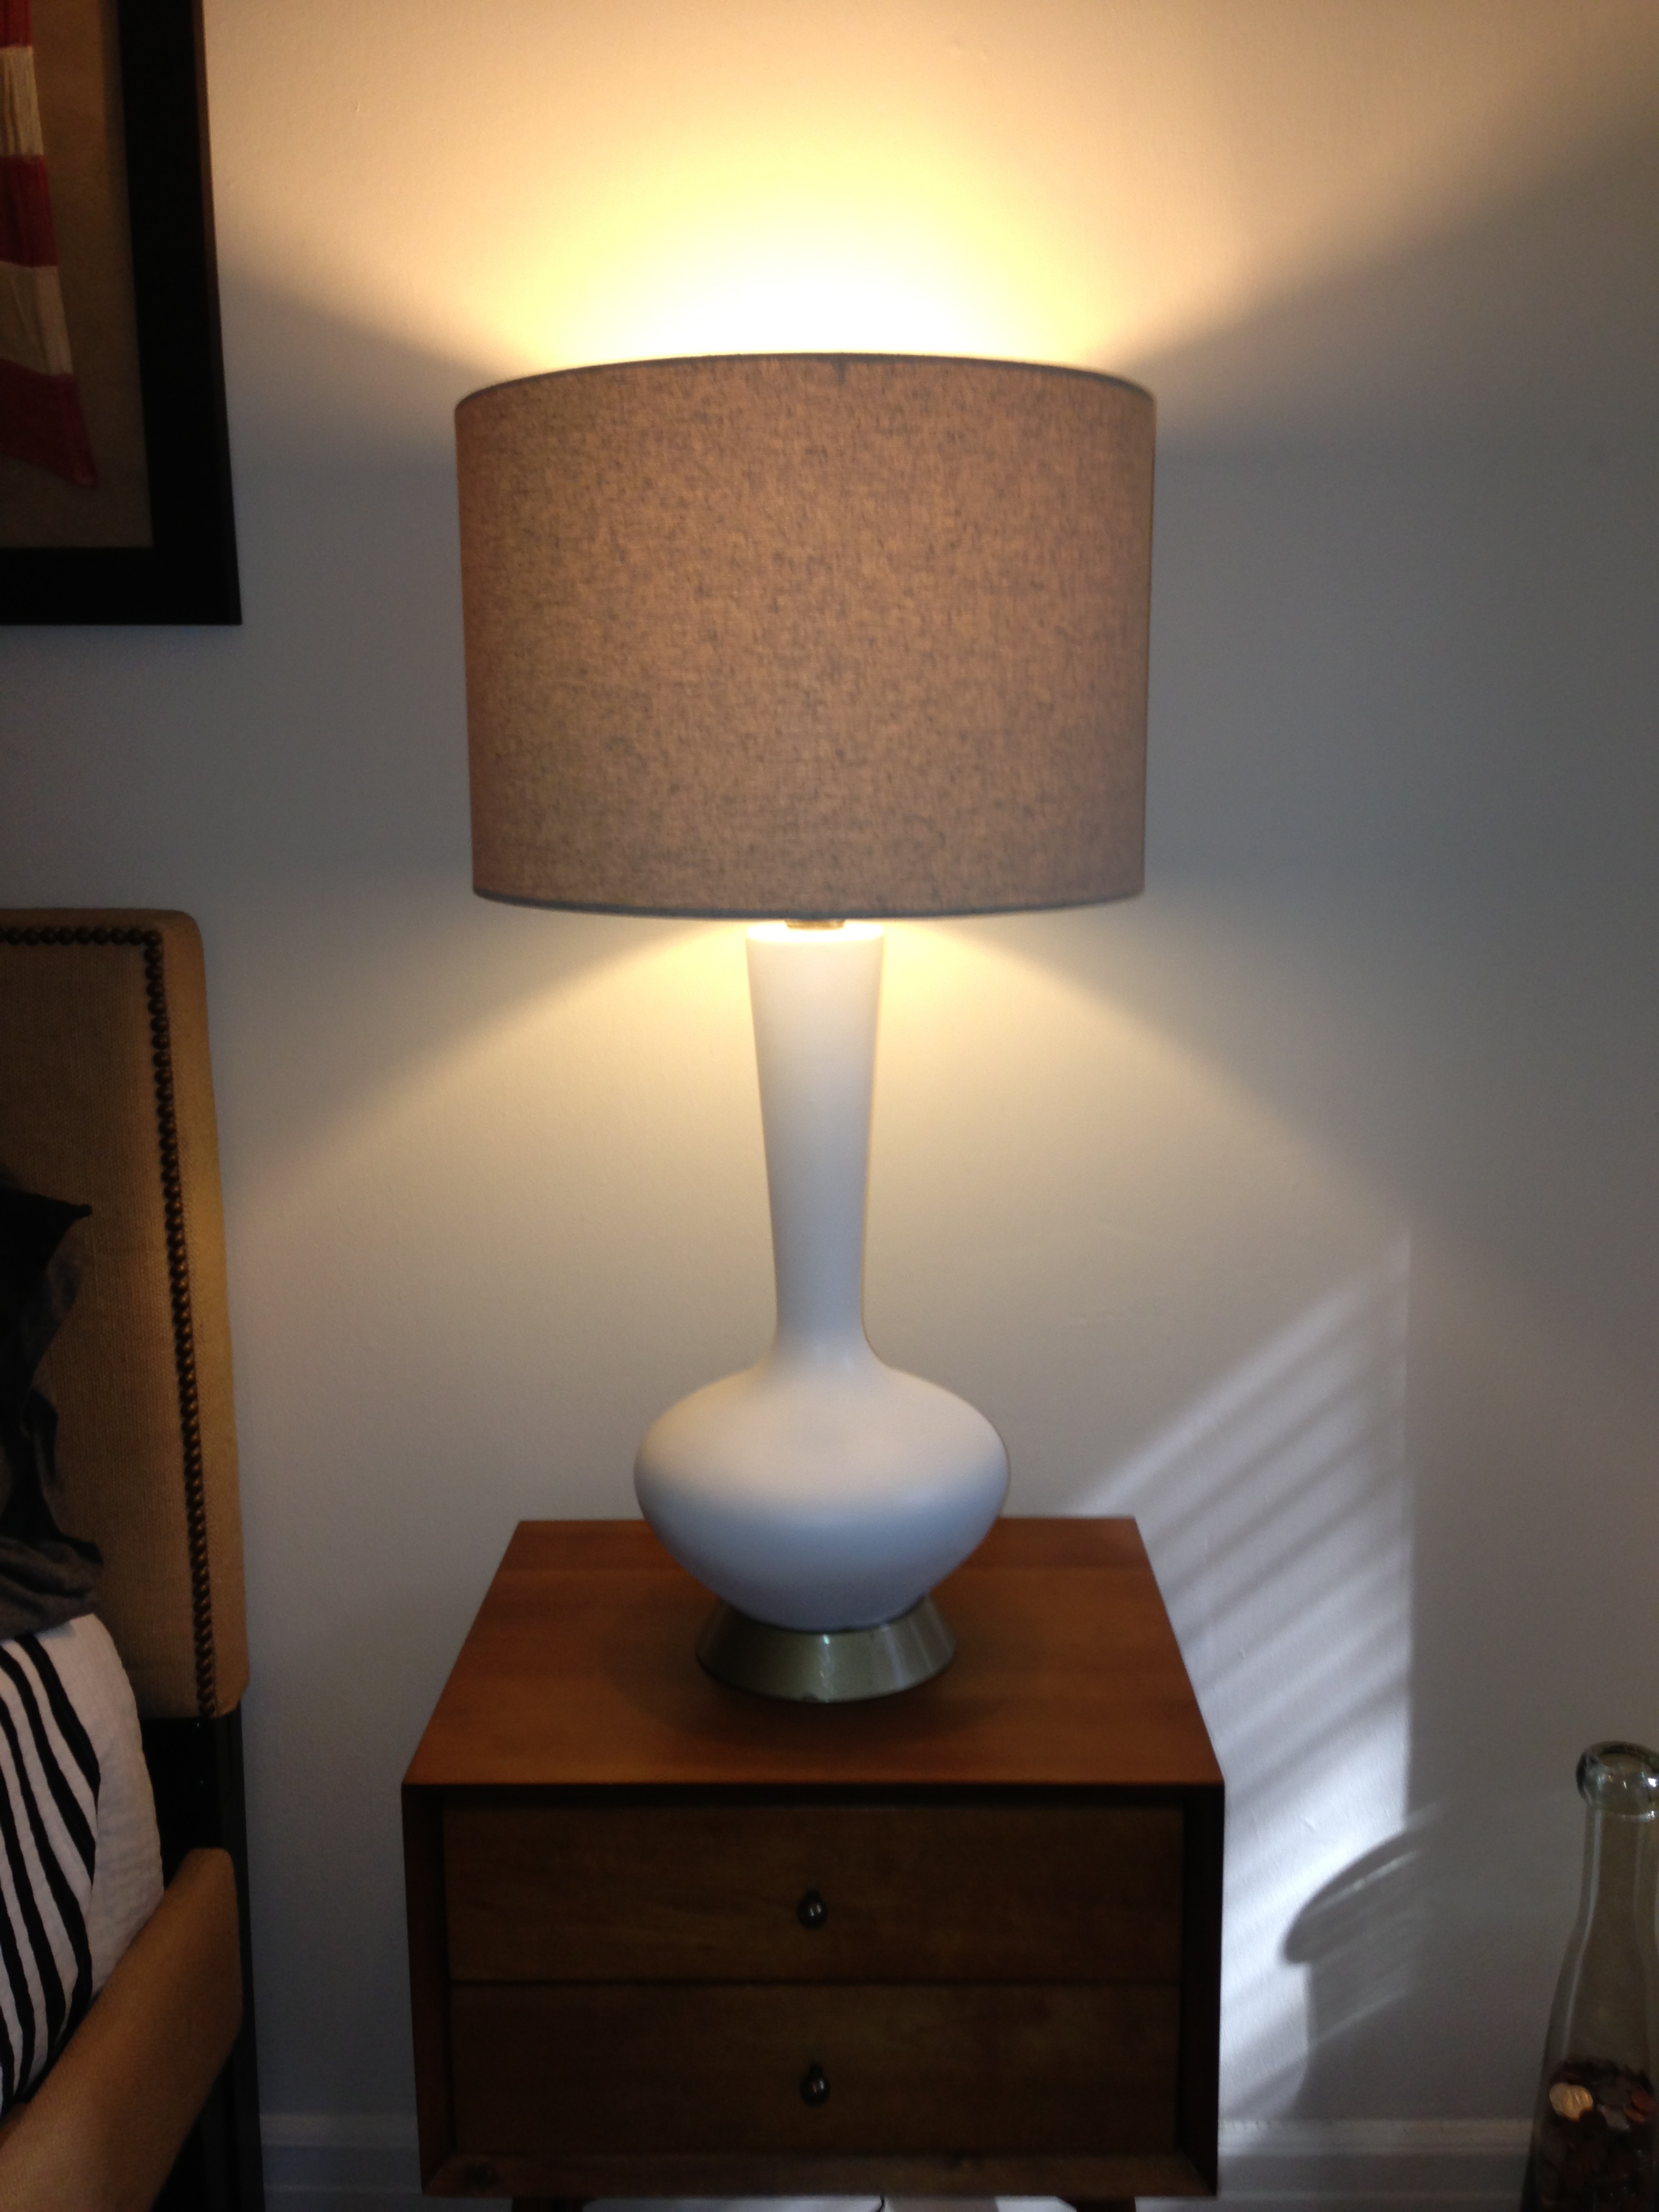
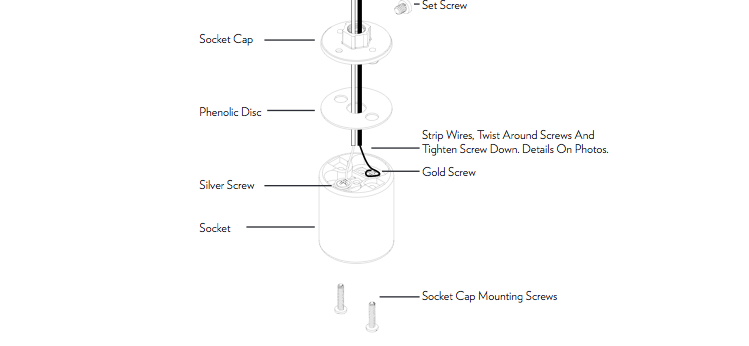
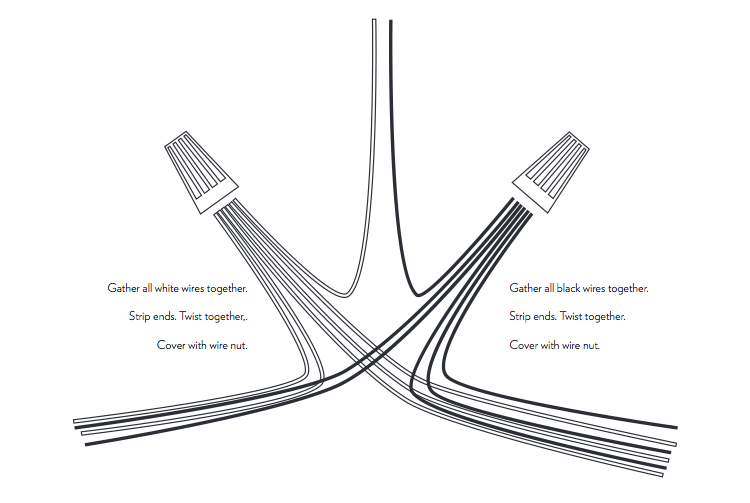
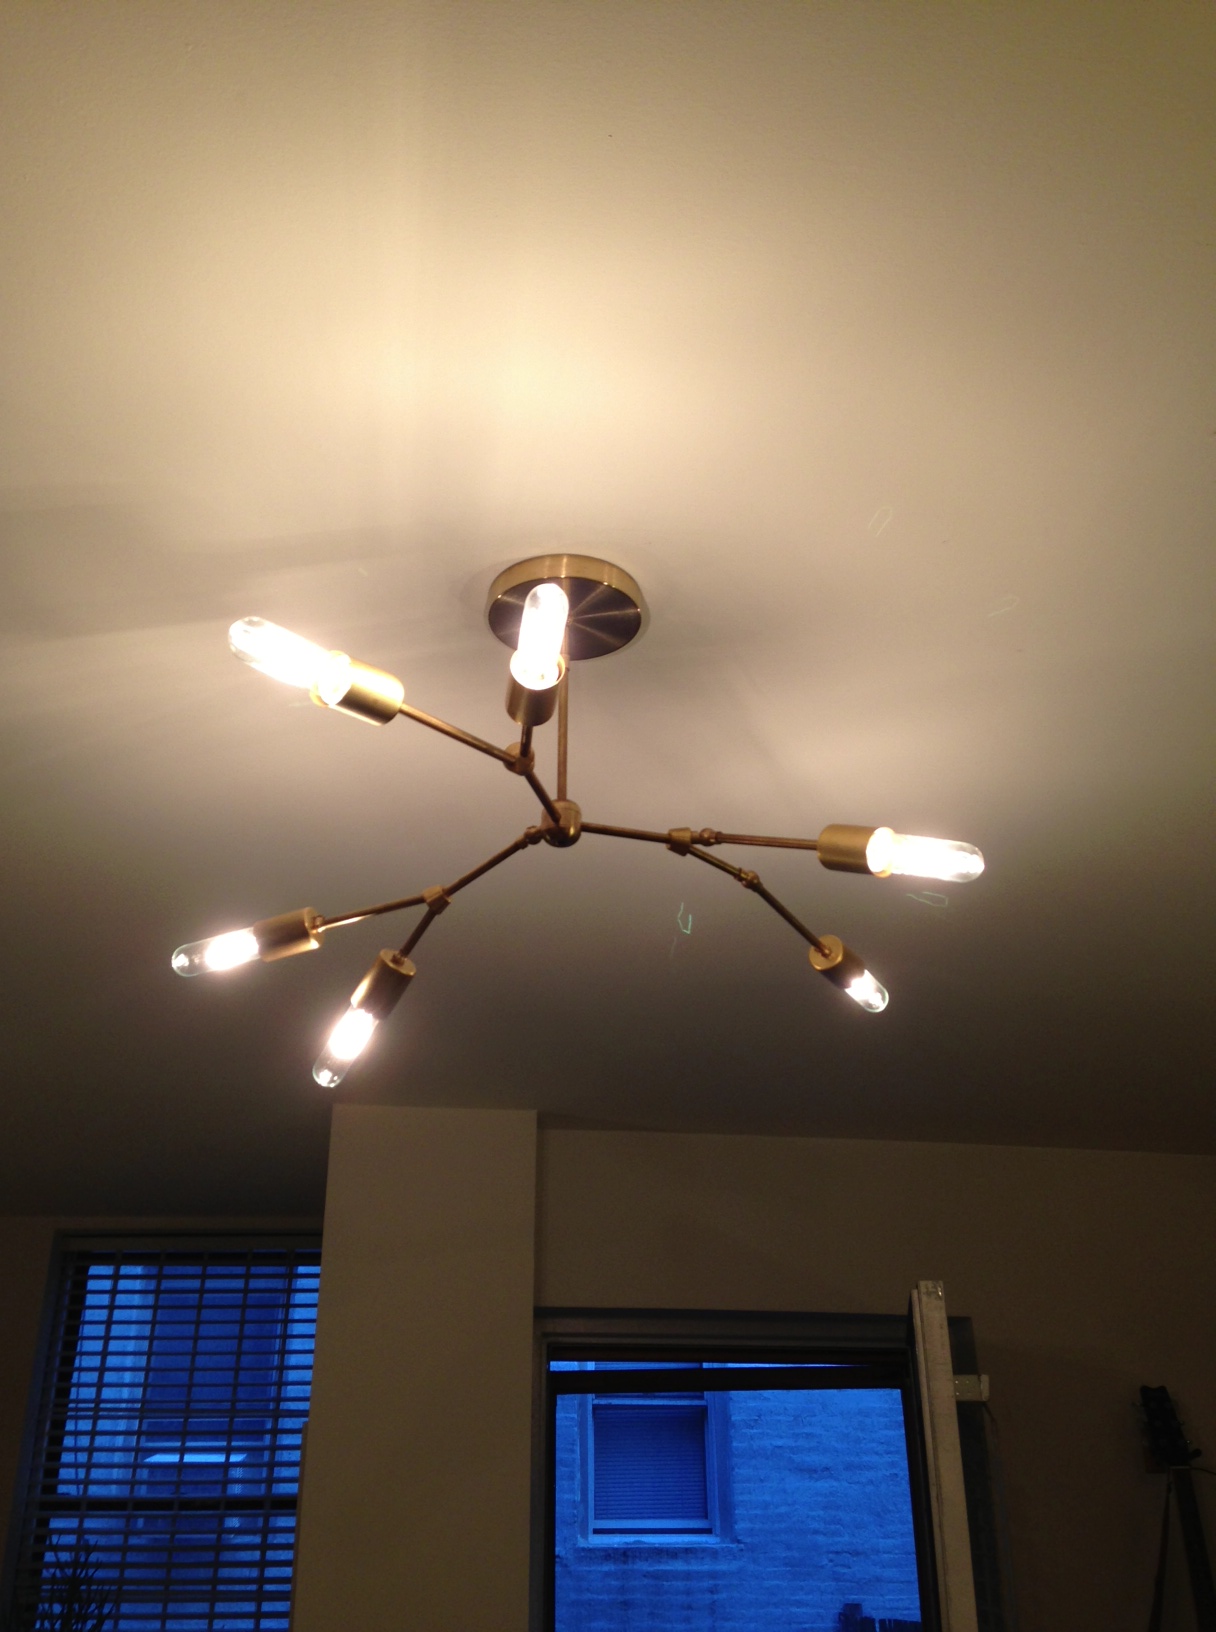
That’s a variation on the Lindsey Adelman chandelier I (and everyone else) made sometime last year. I won’t go into how I did it because I’ve done that before. You can check out the post I linked to above, or just email me directly if you have any questions. The construction follows the same format as the hanging pendant.

I chose to make my own because the off-centered j-box meant I needed an asymmetrical fixture. This particular fixture, however, with its three sockets feeding into one arm, created some tight spaces to work in, so its important to buy manageable wire gauges to work with. Everyone will tell you to buy 14 gauge–and they’re right!–but if you are creating a fixture like this and you have any more than two sockets running through one arm you will need 18 gauge wire. (Just keep the bulbs at or under 40 watts and you’ll be free from the threat of turning your home into kindling. No promises, though.)

So that’s it! Phase One of the bathroom completed. There are a few more phases to come but I’ll probably be secretive about those, too, until someone shames me into posting about it over social media LIKE SOME OF YOU HAVE BEEN DOING, YOU MONSTERS.

* Should we have a challenge? I love a challenge. All joking aside, if you think your rental bathroom and/or kitchen is decent send me a picture (pre-any work you’ve done to spiff it up, if you can). Prove me wrong. And, no, all you fancy individuals in your turn-key apartments and you exorbitant incomes. You only qualify for this particular contest if your apartment didn’t come with a deadbolt upon move in. How’s that to even the playing field?

UPCYCLED: TABLE LAMP

I’m always on the hunt for a new light fixture. I have a preternatural addiction to all things ceramic and glowing. A friend once told me, if there is such a thing as reincarnation, he thinks I will come back as a lamp, and while I find that charming and idiosyncratic it’s certainly not ideal being pegged as the Thomas Edison of cat ladies by your pals. Luckily for my sick perversity, the other side of the double-edged sword that is having an apartment with very little direct sunlight is always having an excuse to enable my bad behavior. This is unlucky for my sense of propriety, however, as I sit in bed and count six–count ’em SIX–lamps in my less-than-300-square-foot apartment.

A few months ago I found a fantastic mid-century stud sun bathing on the sands of eBay and I knew I had to have him:

IMG_3852

WOOF

Is that not the Don Draper of bedside reading lights or what? You could practically smell the Lucky Strikes coming off the computer screen, so I snatched it up and waited not-so-patiently for it to arrive.

A few days later it was delivered and I scurried up to my apartment to rip open the box like a mongoose with a ball of tin foil: all teeth and very little dignity. Once opened I made a curious sound, something like a ‘hrmph’ but closer to a sigh. My gorgeous, curvy electric boyfriend wasn’t as gorgeous as I imagined. Online he was understated and evocative but what laid before me was just dull and sorta lifeless and not at all fresh. Something about the color, the wheat into umber, felt like a huge THUD when I put him on my nightstand.

The day before my mail-order husband came I popped my head into a Pottery Barn and found a super simple yet super classy coarse weave linen drum shade, which just happened to be on sale and which I thought would give the lamp some nice contrast of texture, however it really just made the whole thing monochromatic and flat, so now I was really stuck.

[SIDE NOTE: Can we talk about what a racket the lampshade industry is? First, drum shades are shockingly hard to come by. Even in New York City everything is either tapered or squared or tasseled or embroidered or ruffled or silk taffeta-ed. Since when did Christy Masters and the rest of the A Group start dictating design trends? Then there’s prices! Shades upwards of 300 spanks with most beginning around 75! HUH? And if you don’t want to take out a loan for a little diffused light the only other option is a $15 shade that looks like it was made with Xerox paper and a stick of paste. Where’s the variety, terrible lampshade industry? The whole mess is a hot sack of dead weasels if you ask me. I’ll have to figure out a DIY project for us, the levelheaded and under-served, and post it later. #endkanyerant]

So rather than trash the lamp and accept defeat I decided the give it a facelift. The main problem for me was the color and I figured if I could freshen it up a bit the whole thing could be salvaged.

I started with selecting a primer. When choosing, it’s always easier if you know the top coat of the thing you’ll be painting. My local hardware store had a very small selection of spray can primers so I went with Rust-Oleum Painter’s Touch Ultra Cover. The canister said it bonds to plastic and since the lamp had some type of acrylic sealant as its top coat (I guessed) I figured this was my best bet.

To help the primer bond to the lamp I took a piece of coarse sandpaper–something like a 60 grade–and sanded the whole thing. ALWAYS WEAR A MASK AND GOGGLES WHEN YOU DO THIS. I know I’m a crazed stickler about this but who knows what chemicals you’re releasing into the air by messing with sealants. Protect yourself!

After I scored the lamp with sandpaper I wiped it down with a damp rag to remove any residue and let it dry. While it was drying I covered the lamp’s brass fixtures by wrapping them in sandwich bags and taping them off. Make sure every milometer of what you don’t want painted is covered so you can really go to town with your spray can and not worry about leakage.

Here’s what it looked like after the first coat of primer:

IMG_3846It’s important not to coat the entire lamp, tits to toes, on the first pass. It will require at least two coats to get a smooth, even finish with the primer, but I’m an impatient jerk and I tried to get it all done in one shot. When you do what I did though you run the risk of the paint collecting unevenly in spots and running. Which is what happened to me. Which is why I began to cry.

If this happens fear not and LET THE THING DRY. Once your horrid, lumpy beast of a paint job is dry you can go back with a very fine grade, gently sand down the imperfections and start again:

IMG_3847

It really pays to be patient and follow directions. Give yourselves a big pat on the back, parents!

One way or the other you will get a smooth and supple finish, however I do not recommend doing it my way. It will only cause you unnecessary pain and heartbreak. Take your time and spray gingerly.

Once the primer was dry (I let each coat dry for an hour, even though the can said it would be fine after 20 minutes, to give it maximum hold) I went in with the color. I used Rust-Oleum’s Indoor/Outdoor Satin spray. Again, I’m not a guru about this stuff. I just knew I wanted something durable and if the can says it’s good enough for outdoor furniture then it sure as hell should stand up inside, right? Also I went with satin because it has a matte finish, which is always easier to pull off for novice painters like myself. Remember: the glossier the paint the more imperfections will show when it dries. If you are not at all confident in your skills (like me), do yourself a favor and paint in matte.

IMG_3848Here’s a good tip to keep in mind: spray paint travels. Make sure to cover a larger area than you think you’ll need when painting. It may seem like overkill to buy three tarps when one will do you just fine but after a few coats and a light breeze those small particles can accumulate to make a big problem. Check out my patio once I finished. I lifted the rug just for some shits and giggles:

IMG_3849

Finn does not approve.

Don’t be like me, kids. Take the time to cover your workspace. You (and your landlord) will thank you.

I gave the lamp four coats in total. That was probably overkill but I really wanted there to be a richness to the satin and a sense of texture to work with the shade. I think two coats should do most everyone else just fine.

Here was the end result:

IMG_3853I think it’s a vast improvement over the original. Now it works with the shade, the brass fixtures and my apartment, and for $14, two cans of spray paint and roughly two hours of actual labor I was able to salvage something old and make it my own. There are a lot of things I would’ve done differently in hindsight (namely, taken my goddamn time) but even when things went wrong they were beyond simple to repair.

CHANDELIER DIY

I first discovered Lindsey Adelman‘s work during a recent window shopping sweep through SoHo. It was in one of those furniture shops where nothing has price tags. You know the ones I’m talking about. You walk in, someone stares you down and suddenly you’re Julia Roberts on Rodeo Drive.

As uncomfortable as they may be I never count these places out. If your door is open I’m-a comin’ in–that’s how I feel about it, regardless if I have the money to spend (which I don’t). Who cares if the place might be a little stuffy and the staff’s a tad rude? Use it as an opportunity to find great inspiration for a cheap DIY project. The world is your Ikea! Go out and take it by the meatballs! Lucky for me, Lindsey’s site has instructions for a DIY version of her very popular Agnes chandelier series.

My only prior experience with electrical wiring did not end well. It was July of 2012 and the third day in my new apartment. I went to Home Depot to pick up a few things and came back with a beautiful bistro-inspired pendant light for the kitchen. I hadn’t planned on changing out that fixture but it was marked down 80% and for a discount I’ll do anything once.

It was the ground wire that tripped me up. Since my apartment building is old most of the ceiling fixtures don’t have one. (If you open a fixture in a newer home, or buy a ceiling light from a department store, the ground wire is the green one, along with the white wire, called neutral, and the black or red wire, referred to as hot.) A very oversimplified explanation for the ground wire is to ensure you don’t shock yourself when touching the fixture. I may sound all smart and educated and junk about this stuff now, but last year I was clueless. I took one look at that little green devil and, recalling my second grade color wheel, figured it would go best with black, so I wrapped the two together, stuffed it all back into the ceiling and flipped the switch.

Blowing the breaker, I sort of expected. The fireball and subsequent man squeal I made, I did not. Needless to say, as gorgeous and exciting (and cost effective) as Lindsey’s chandelier was, I was nervous going in.

Most everything I needed I found at Grand Brass and the few things I couldn’t get there (wire, wire strippers, etc) I picked up at the hardware store. Nothing was hard to find nor was it very expensive:

IMG_4099

The beauty of this project is there really are no rules. Unlike stripping a piece of furniture or tiling you can do this any way you want. It’s a little bit like Lincoln Logs. You can build a fort for your G.I. Joes (my brother) or you can construct a three-story condo with attached garage and indoor sauna for your female X-Men figurines (me). It’s up to you. Just make sure you get enough wire. The last thing you want is to be wiring all these arms and run short. Plus if you’ve never used wire strippers before it may take some practice, and if you’re not careful you will cut through your supply faster than you realize. Play it safe and get 2 yards more than you think you’ll need. It’s cheap and you’ll thank yourself later.

Wiring a lamp is deceptively simple. All you’re doing is connecting the neutral and hot wires to the socket, which houses each bulb, then building each arm of the lamp around the wires. It doesn’t matter how many arms you decide to make, for each bulb it will be the same process:

Connect each wire to the porcelain socket. The hot wire, black or red, will always attach to the gold screw

Then build the arm around the screw, threading the wire as you go

When you finish each arm of the chandelier you’ll end up with multiple neutral and hot wires sprouting from the tips. Rather then fuss about with all these wires make life easier on yourself by combining all the blacks together and all the whites together. Strip two more long pieces of each wire, connect those to their respective cluster and twist the whole thing together with a wing nut:

Screen Shot 2013-11-20 at 2.44.11 PMThis makes everything less confusing when you go to wire it to the ceiling or a wall socket. Wiring a lamp is all about current; allowing the electrical current from the power source to travel the length of the wires and into the bulb to turn it on. When you combine a cluster of wires, like above, just make sure each wire has enough of its insides exposed (about an inch is fair) to permit the current to travel between each one.

That’s basically it! So here’s what I started with:

And this is what I ended up with:

photoQuite an improvement, don’t you think? It’s incredibly simple and classy, so now you really have no excuse to have one of those terrible ceiling boobs in your home if you don’t want it.

P.S. Grand Brass has done a brilliant thing! You can buy Lindsey Adelman’s entire lamp kit in one fell swoop by clicking HERE. It’s $140–a little more expensive than piecemealing all the components together like I did but worth it if this is your first go at wiring a lamp!

P.P.S. I even added a dimmer switch, which you really do need for a lamp with this many bulbs, but that’s for another post!

THE RENTER’S DILEMMA

There are few things in life more obnoxious than signing your first lease only to discover the list of riders that comes with it is longer than the lease itself (forgetting your phone in a cab and stepping barefoot on a Lego are the only two that could be worse).”Tenant shall not paint or repaint any part of the apartment.” “Tenant shall not decorate in a manner which alters the appearance of the apartment.” “Tenant shall not attempt to make the space his/hers in any way and live out the lease term in quiet solitude, staring ponderously at the white walls and thinking about why he/she signed this lease to begin with.”

This is the modus operandi for rentals in New York and so it is with my apartment, too. So what do you do? I’m all for clean white walls but they’re not for everyone, and eventually you need to feel like you’ve left your mark on the space you spend the other 50% of your day in. Check out my bathroom, for instance:

IMG_2826

Not cute.

IMG_3563

The plant fools no one.

I changed the vanity lighting to chrome top bulbs–a super simple and cheap fix that can make any room feel a little more lux–but that wasn’t cutting it. Then I discovered the extraordinarily beautiful adhesive wall decals from the folks over at MUR. Affordable, modern and easier to put on than jorts in summer, you can slap these suckers (and prints) on your wall without the fear of leaving behind that icky glue residue or chipping the paint underneath (Read: YOUR SECURITY DEPOSIT WILL BE SAFE).

I wanted to do something with their Stripes, something  vertical and multicolored to give the room the feeling of being much bigger than it actually is, but I know me and I know I can’t draw a straight line to save my life so the thought of figuring that one out made me break into ugly sweats. Instead I went with their ‘Mini’ Southwest collection and I couldn’t be happier:

IMG_4292

BIG difference…

IMG_4291

…very little effort!

I went with two tones just because I need to prove I’m fancy, though one color would’ve been fine and cut the price in half. Even still, including shipping it was only about 40 spanks. Not included in the price was the bottle of red wine and Paul Simon’s Greatest Hits album I bought on iTunes, but if you’re like me then you know alcohol and music is a given when tackling any home project.

Once I got the measurements down the rest really just fell into place. The trickiest bits were the light socket and medicine cabinet, but the decals are so mailable you can crease them to fit the corners without damaging their appearance. Once they were in place I ran a razor blade along the edge to get an smooth cut and that was that. For the outlet, however, I did remove the face plate (remember to turn off the breaker) to give the stickers the appearance of being painted on.

IMG_4294

I’m really pleased with the end result. I think in a year or so I’ll take them down and try a new design, which is completely doable at this project’s price-point and skill level. Sky’s the limit when it comes to this DIY! Who knows–maybe a nifty new blacksplash is in my kitchen’s near future?

BRIGHT IDEA

I look at lighting less as a utilitarian tool and more as a mood setter. Yes, we need light to read and cook and see how how abysmally low our monthly bank statement is, but that doesn’t mean a 100W overhead fluorescent is the end all be all.

The problem with rentals of a certain price range is that most only have those 100Wers, no dimmers and lots of crude brass adornments. Since it’s not practical to rewire a house that’s not your own I’ve been looking at some simple solutions—quick fixes that are easy to install, look contemporary and diffuse light evenly within the apartment.

ikea--utkik-ceiling-lamp__0118314_PE273868_S4

Ikea has some pretty serious pendants and I’m really drawn to this one. Since little of what I own is light or feminine, this Art Deco shade will be great at replicating the kind of structure and rigidity I plan on bringing to the rest of the space.