I first discovered Lindsey Adelman‘s work during a recent window shopping sweep through SoHo. It was in one of those furniture shops where nothing has price tags. You know the ones I’m talking about. You walk in, someone stares you down and suddenly you’re Julia Roberts on Rodeo Drive.
As uncomfortable as they may be I never count these places out. If your door is open I’m-a comin’ in–that’s how I feel about it, regardless if I have the money to spend (which I don’t). Who cares if the place might be a little stuffy and the staff’s a tad rude? Use it as an opportunity to find great inspiration for a cheap DIY project. The world is your Ikea! Go out and take it by the meatballs! Lucky for me, Lindsey’s site has instructions for a DIY version of her very popular Agnes chandelier series.
My only prior experience with electrical wiring did not end well. It was July of 2012 and the third day in my new apartment. I went to Home Depot to pick up a few things and came back with a beautiful bistro-inspired pendant light for the kitchen. I hadn’t planned on changing out that fixture but it was marked down 80% and for a discount I’ll do anything once.
It was the ground wire that tripped me up. Since my apartment building is old most of the ceiling fixtures don’t have one. (If you open a fixture in a newer home, or buy a ceiling light from a department store, the ground wire is the green one, along with the white wire, called neutral, and the black or red wire, referred to as hot.) A very oversimplified explanation for the ground wire is to ensure you don’t shock yourself when touching the fixture. I may sound all smart and educated and junk about this stuff now, but last year I was clueless. I took one look at that little green devil and, recalling my second grade color wheel, figured it would go best with black, so I wrapped the two together, stuffed it all back into the ceiling and flipped the switch.
Blowing the breaker, I sort of expected. The fireball and subsequent man squeal I made, I did not. Needless to say, as gorgeous and exciting (and cost effective) as Lindsey’s chandelier was, I was nervous going in.
Most everything I needed I found at Grand Brass and the few things I couldn’t get there (wire, wire strippers, etc) I picked up at the hardware store. Nothing was hard to find nor was it very expensive:

The beauty of this project is there really are no rules. Unlike stripping a piece of furniture or tiling you can do this any way you want. It’s a little bit like Lincoln Logs. You can build a fort for your G.I. Joes (my brother) or you can construct a three-story condo with attached garage and indoor sauna for your female X-Men figurines (me). It’s up to you. Just make sure you get enough wire. The last thing you want is to be wiring all these arms and run short. Plus if you’ve never used wire strippers before it may take some practice, and if you’re not careful you will cut through your supply faster than you realize. Play it safe and get 2 yards more than you think you’ll need. It’s cheap and you’ll thank yourself later.
Wiring a lamp is deceptively simple. All you’re doing is connecting the neutral and hot wires to the socket, which houses each bulb, then building each arm of the lamp around the wires. It doesn’t matter how many arms you decide to make, for each bulb it will be the same process:

Connect each wire to the porcelain socket. The hot wire, black or red, will always attach to the gold screw
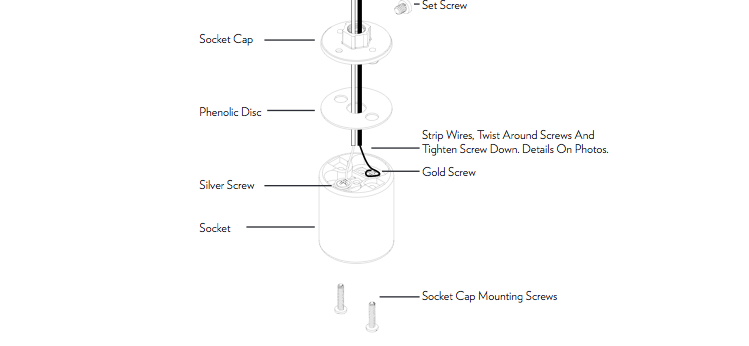
Then build the arm around the screw, threading the wire as you go
When you finish each arm of the chandelier you’ll end up with multiple neutral and hot wires sprouting from the tips. Rather then fuss about with all these wires make life easier on yourself by combining all the blacks together and all the whites together. Strip two more long pieces of each wire, connect those to their respective cluster and twist the whole thing together with a wing nut:
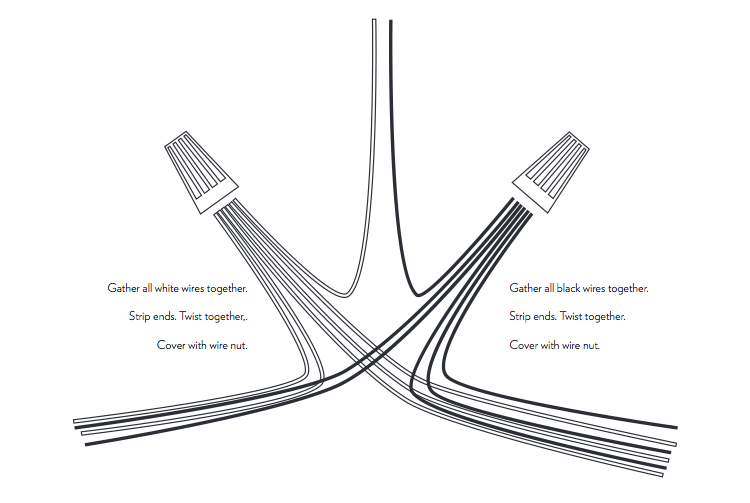 This makes everything less confusing when you go to wire it to the ceiling or a wall socket. Wiring a lamp is all about current; allowing the electrical current from the power source to travel the length of the wires and into the bulb to turn it on. When you combine a cluster of wires, like above, just make sure each wire has enough of its insides exposed (about an inch is fair) to permit the current to travel between each one.
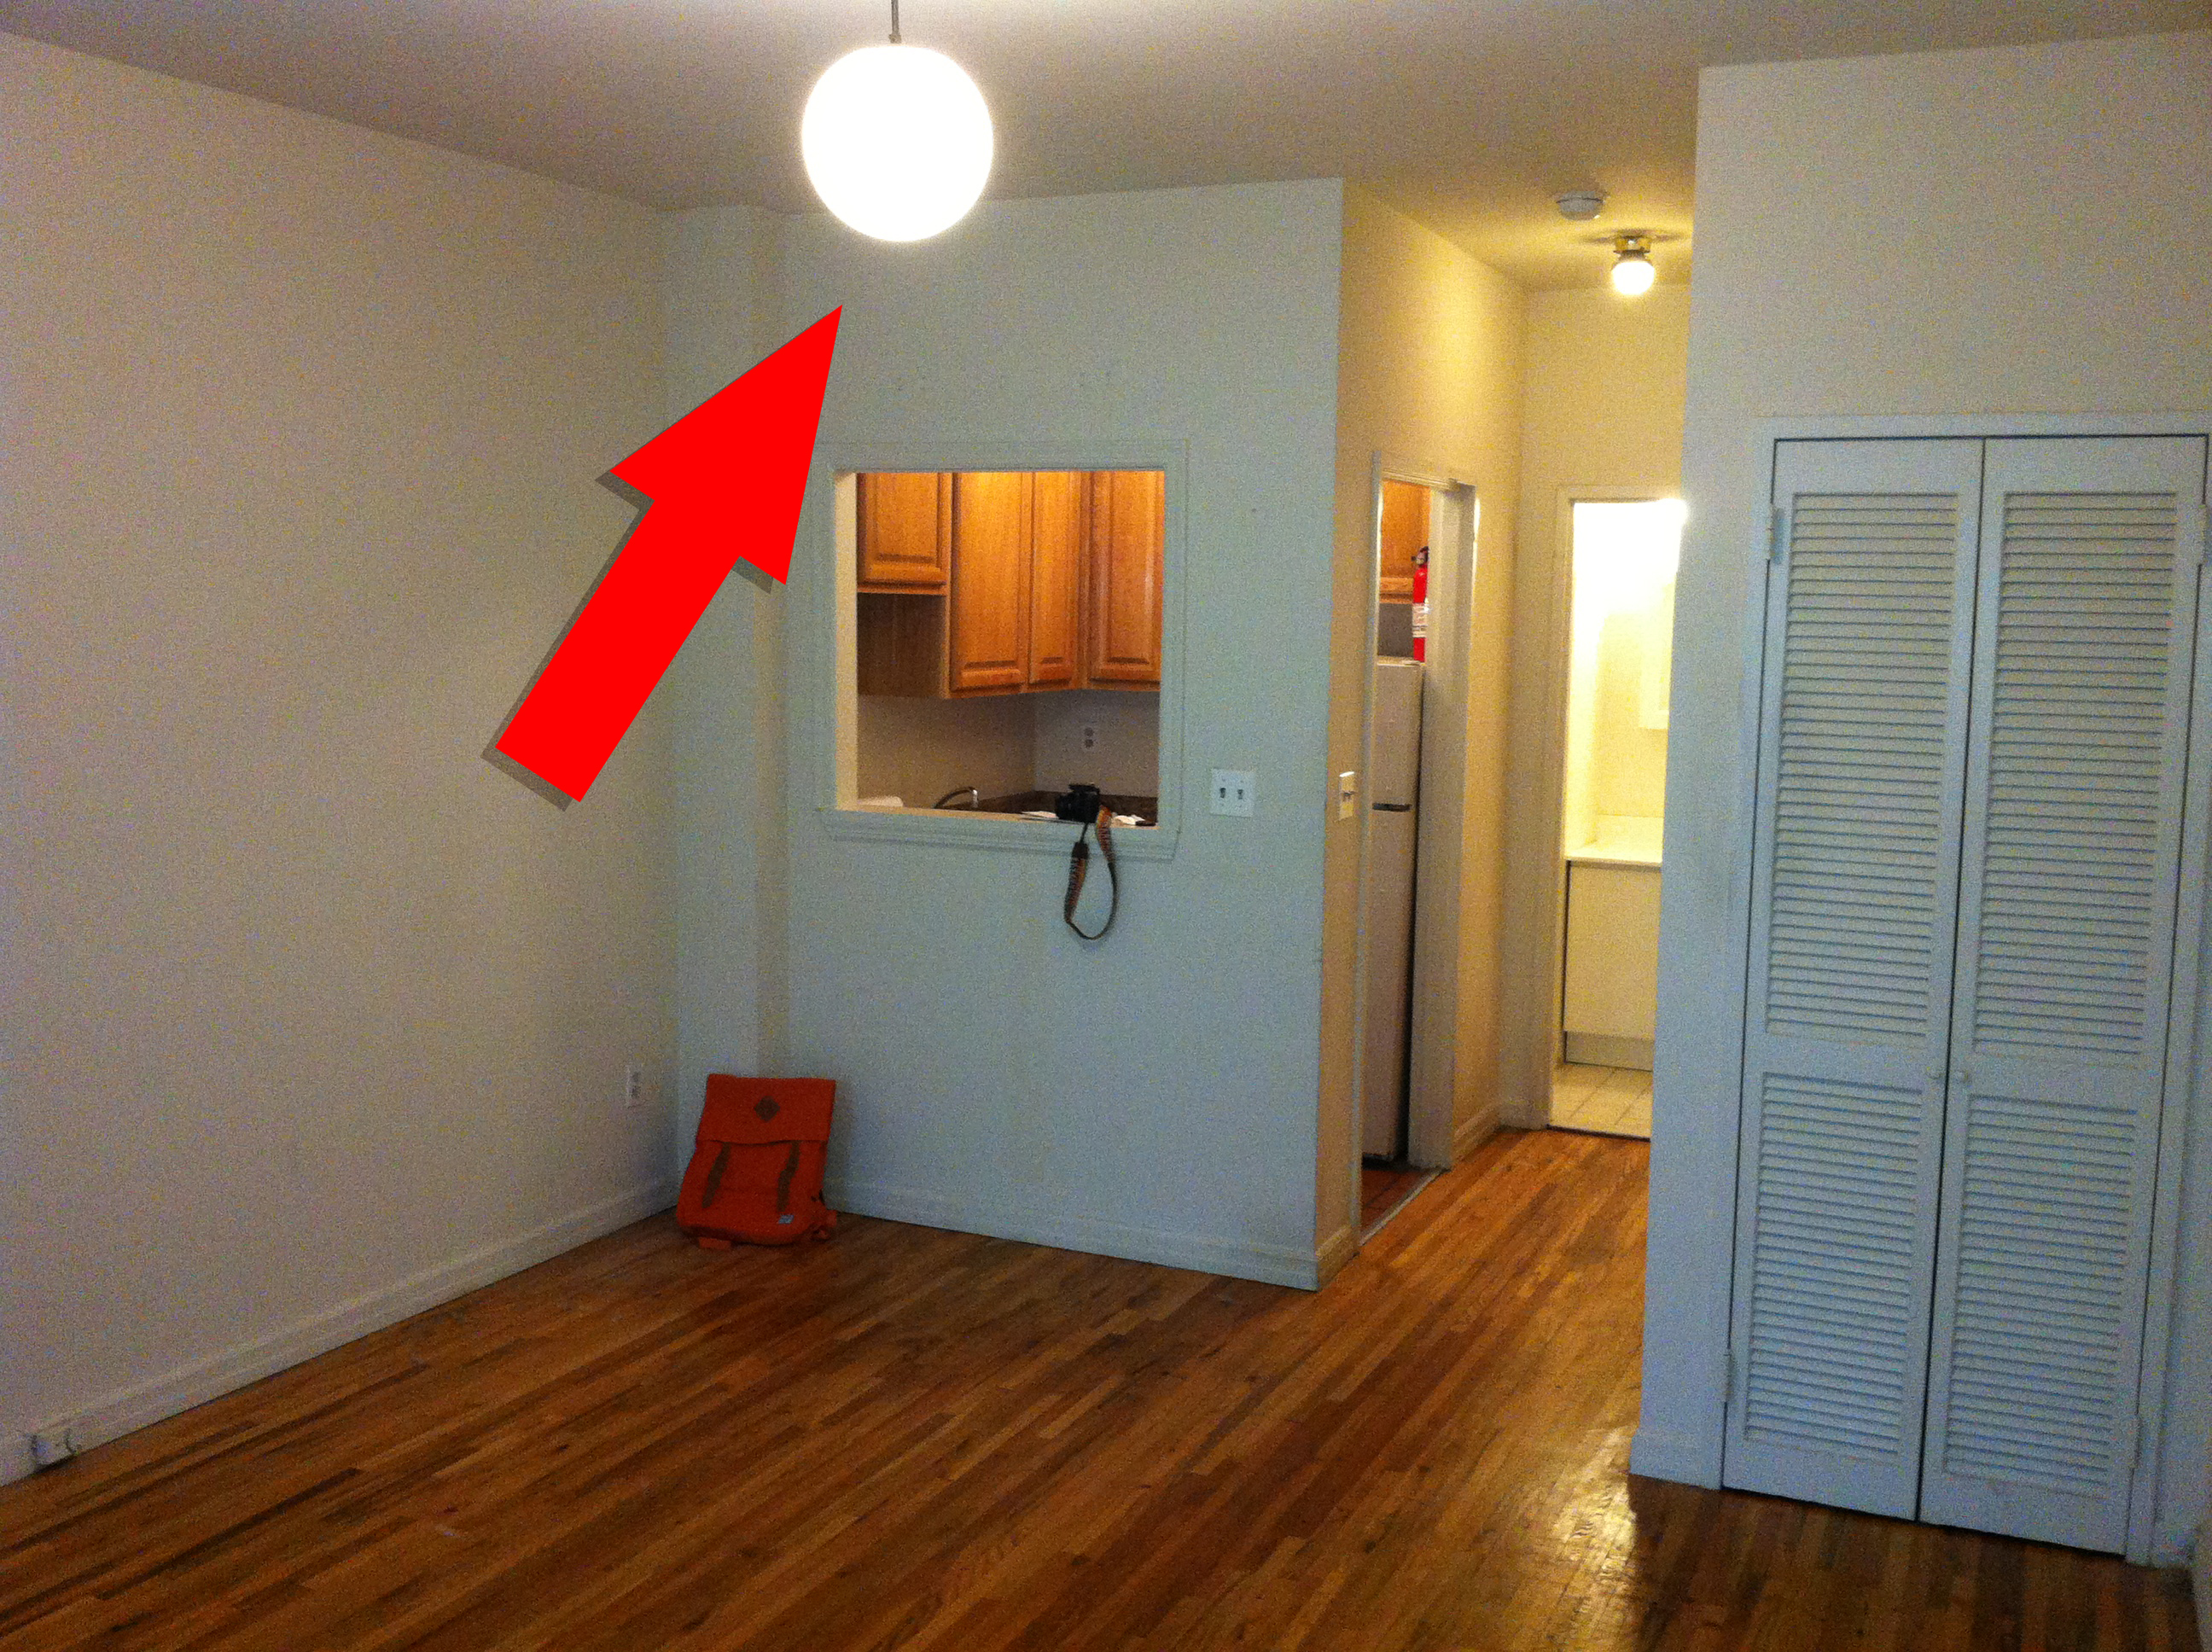
That’s basically it! So here’s what I started with:
 And this is what I ended up with:
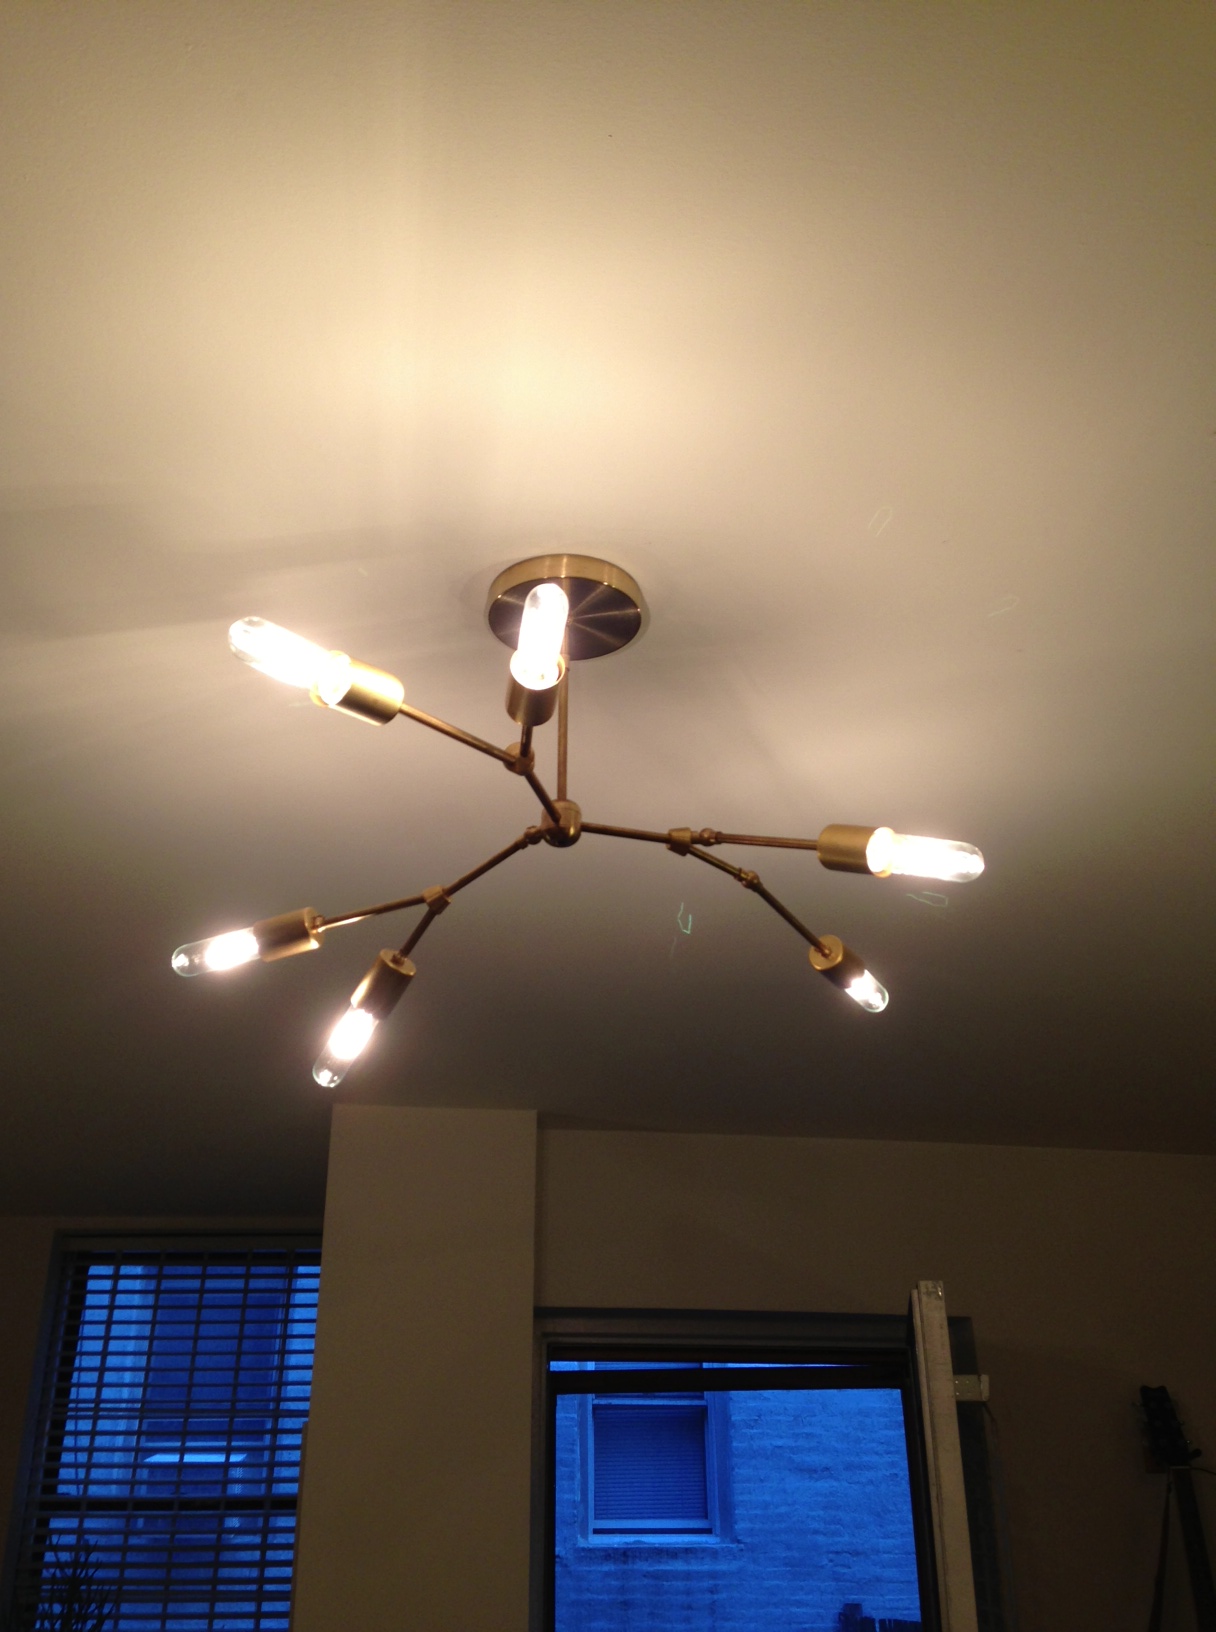 Quite an improvement, don’t you think? It’s incredibly simple and classy, so now you really have no excuse to have one of those terrible ceiling boobs in your home if you don’t want it.
P.S. Grand Brass has done a brilliant thing! You can buy Lindsey Adelman’s entire lamp kit in one fell swoop by clicking HERE. It’s $140–a little more expensive than piecemealing all the components together like I did but worth it if this is your first go at wiring a lamp!
P.P.S. I even added a dimmer switch, which you really do need for a lamp with this many bulbs, but that’s for another post!
